I love the spring. Farmers markets are starting back up and/or extending their hours. The days are longer. The semester is nearing its end. And you can eat strawberries, rhubarb, and asparagus.
Here is a wonderful recipe from my roommate's family arsenal.
Rhubarb and Strawberry Cake with Pie Crumb Topping
What You Need
- 1 egg
- 1 cup plain yogurt
- 1 cup sugar
- 1 1/4 cups flour
- 1 teaspoon baking soda
- 1/2 teaspoon salt
- 2 cups rhubarb, chopped
- 1-2 cups strawberries, chopped
- 1/2 cup flour
- 1/2 cup oatmeal
- 1/2 cup brown sugar
- 1/4 cup butter, softened
- dash cinnamon
- small dash nutmeg
What You Do
1. Pre-heat oven to 350.
2. Mix together egg, yogurt, sugar, flour, baking soda, and salt.
3. Fold in rhubarb and strawberries.
4. Pour mixture into a greased and floured pan.
5. Mix together remaining flour, oatmeal, brown sugar, and butter.
6. Add dash of cinnamon and nutmeg.
7. Sprinkle topping over the cake.
8. Bake for 50 minutes.
Yum. Celebrate the spring.
Showing posts with label Sweets. Show all posts
Showing posts with label Sweets. Show all posts
Friday, May 13, 2011

Tuesday, February 15, 2011
The Winning Birthday Cake
The winning birthday cake recipe was a combination of a couple that my roommate and I reviewed over the past few months. My roommate ended up making the Cocoa Layer Cake, previously posted to the blog. The major difference from the initial post was that the instead of using a layer of icing in the middle, she spread raspberry jam. Wow! What a fantastic combination. For the frosting, she used the frosting from the Chocolate-Red Wine Cake, which just involves 3/4 cup hot cream and 3/4 cup chocolate chips. This birthday cake was perfect and, of course, I enjoyed all the trial runs. 


As you can see, I was a happy birthday girl.


As you can see, I was a happy birthday girl.
Saturday, January 29, 2011
Birthday Cake Audition
I am getting ready for my birthday one week from today. Most importantly, I need to plan the menu for my pre-birthday dinner party. In honor of birthday menu planning, my roommate and I held an audition for the chocolate cake in this month's Bon Appetit magazine. While the recipe recommends baking the cake in 3 9-inch-diameter cake pans with 11/2-inch-high sides, we cut the recipe in half and used a sheet cake pan. We cut the cake in half before icing it and had only two layers.
Cocoa Layer Cake (from Bon Appetit)
What You Need
Cake:
- 1/2 cup natural unsweetened cocoa powder (spooned into cup to measure, then leveled)
- 1 cup lukewarm water, divided
- 1/2 cup buttermilk
- 1 1/2 cups cake flour (spooned into cups to measure, then leveled)
- 3/4 teaspoon baking soda
- 1 cup sugar
- 1/2 cup (packed) golden brown sugar
- 1/2 cup (1 stick) unsalted butter, room temperature
- 2 large eggs, room temperature, beaten to blend
Frosting:
- 10 tablespoons (1 1/4 sticks) unsalted butter
- 1 1/3 cups (packed) golden brown sugar
- 1 cup natural unsweetened cocoa powder
- 2 teaspoons instant espresso powder (we didn't have any- so we omitted it)
- 1 cup heavy whipping cream
- 2 teaspoons vanilla extract
What You Do
Cake:
1. Position 1 rack in top third and 1 rack in bottom third of oven; preheat to 350°F.
2. Line the pan(s) with parchment paper and butter the parchment.
3. Whisk cocoa and 1/2 cup warm water in small bowl.
4. Whisk buttermilk and 1/2 cup water in another small bowl.
5. Sift flour, baking soda, and 1/4 teaspoon salt into medium bowl.
6. Using electric mixer, beat both sugars and butter in large bowl until pale yellow and fluffy (mixture will appear granular), about 5 minutes (you don't really need that long).
7. With mixer running, gradually add beaten eggs, then beat until smooth and fluffy, about 15 seconds.
8. Add cocoa mixture; beat to blend.
9. Add flour mixture in 3 additions alternately with buttermilk mixture in 2 additions, beating to blend after each addition. Divide batter among pans (about 1 3/4 cups each).
10. Bake cakes until tester inserted into center comes out clean, reversing pans halfway through baking, about 18 minutes.
11. Cool completely in pans on racks.
Frosting:
1. Melt butter in medium saucepan over medium heat.
2. Stir in sugar, cocoa, espresso powder, and 1/2 teaspoon salt.
3. Gradually stir in cream.
4. Stir until mixture is very hot and just begins to simmer at edges (it should look amazing and yummy!).
5. Reduce heat to low; stir 1 minute to let flavors blend.
6. Transfer to medium bowl; stir in vanilla (frosting will resemble chocolate sauce).
7. Chill until just thickened, stirring occasionally, about 1 1/2 hours.
8. Let stand at room temperature.
9. Run knife around cake sides.
10. Carefully invert 1 cake onto plate (cake is very tender); peel off parchment.
11. Spread with 1/2 cup frosting.
12. Invert second cake onto palm of hand.
13. Position cake 2 inches above frosted cake layer.
14. Carefully slide cake onto first cake layer. Peel off parchment.
15. Spread cake with 1/2 cup frosting.
16. Repeat with third cake layer.
17. Spread remaining frosting over top and sides of cake.

 Enjoy, whether it is your birthday or not.
Cocoa Layer Cake (from Bon Appetit)
What You Need
Cake:
- 1/2 cup natural unsweetened cocoa powder (spooned into cup to measure, then leveled)
- 1 cup lukewarm water, divided
- 1/2 cup buttermilk
- 1 1/2 cups cake flour (spooned into cups to measure, then leveled)
- 3/4 teaspoon baking soda
- 1 cup sugar
- 1/2 cup (packed) golden brown sugar
- 1/2 cup (1 stick) unsalted butter, room temperature
- 2 large eggs, room temperature, beaten to blend
Frosting:
- 10 tablespoons (1 1/4 sticks) unsalted butter
- 1 1/3 cups (packed) golden brown sugar
- 1 cup natural unsweetened cocoa powder
- 2 teaspoons instant espresso powder (we didn't have any- so we omitted it)
- 1 cup heavy whipping cream
- 2 teaspoons vanilla extract
What You Do
Cake:
1. Position 1 rack in top third and 1 rack in bottom third of oven; preheat to 350°F.
2. Line the pan(s) with parchment paper and butter the parchment.
3. Whisk cocoa and 1/2 cup warm water in small bowl.
4. Whisk buttermilk and 1/2 cup water in another small bowl.
5. Sift flour, baking soda, and 1/4 teaspoon salt into medium bowl.
6. Using electric mixer, beat both sugars and butter in large bowl until pale yellow and fluffy (mixture will appear granular), about 5 minutes (you don't really need that long).
7. With mixer running, gradually add beaten eggs, then beat until smooth and fluffy, about 15 seconds.
8. Add cocoa mixture; beat to blend.
9. Add flour mixture in 3 additions alternately with buttermilk mixture in 2 additions, beating to blend after each addition. Divide batter among pans (about 1 3/4 cups each).
10. Bake cakes until tester inserted into center comes out clean, reversing pans halfway through baking, about 18 minutes.
11. Cool completely in pans on racks.
Frosting:
1. Melt butter in medium saucepan over medium heat.
2. Stir in sugar, cocoa, espresso powder, and 1/2 teaspoon salt.
3. Gradually stir in cream.
4. Stir until mixture is very hot and just begins to simmer at edges (it should look amazing and yummy!).
5. Reduce heat to low; stir 1 minute to let flavors blend.
6. Transfer to medium bowl; stir in vanilla (frosting will resemble chocolate sauce).
7. Chill until just thickened, stirring occasionally, about 1 1/2 hours.
8. Let stand at room temperature.
9. Run knife around cake sides.
10. Carefully invert 1 cake onto plate (cake is very tender); peel off parchment.
11. Spread with 1/2 cup frosting.
12. Invert second cake onto palm of hand.
13. Position cake 2 inches above frosted cake layer.
14. Carefully slide cake onto first cake layer. Peel off parchment.
15. Spread cake with 1/2 cup frosting.
16. Repeat with third cake layer.
17. Spread remaining frosting over top and sides of cake.


 Enjoy, whether it is your birthday or not.
Wednesday, December 22, 2010
Chocolate-Red Wine Cake
 A very celebratory dessert. My roommate took the lead on this one, but it was too good not to share with you. This cake started with my roommate and I drooling over the cover of December's Bon Appetit and the pictured Spiced Chocolate Torte Wrapped in Chocolate Ribbons. Go check out the link immediately and come back.
Back?
So, the torte was a bit elaborate for us pre-finals so I found an amazing alternative. We even went out to get a bundt pan for the occasion.
Chocolate-Red Wine Cake (adapted from Food and Wine and this one too)
What You Need
- 2 cups all-purpose flour
- 3/4 cup unsweetened cocoa powder
- 1 1/4 teaspoons baking soda
- 1/2 teaspoon salt
- 2 sticks unsalted butter, softened
- 1 3/4 cups sugar
- 2 large eggs
- 1 teaspoon pure vanilla extract
- 1 1/4 cups dry red wine
- 3/4 cup heavy cream
- 3/4 cup milk chocolate chips/chopped
Variation: The original recipe called the cake to be served with confectioner's sugar (for dusting the finished cake) and whipped cream. We opted for a chocolate icing. Of course, the choice is yours depending on how luscious you are feeling.
What You Do
1.Preheat the oven to 350°.
2. Butter and flour a 12-cup bundt pan.
3. In a bowl, whisk the flour, cocoa powder, baking soda and salt.
4. In a large bowl, using a handheld electric mixer, beat the butter with the sugar at medium-high speed until fluffy, 4 minutes.
5. Add the eggs, one at a time, and beat until incorporated.
6. Add the vanilla and beat for 2 minutes longer.
7. Working in two batches, alternately fold in the dry ingredients and the wine, until just incorporated.
8. Scrape the batter into the prepared pan, and bake for 45 minutes, until a toothpick inserted in the center comes out clean.
9. Meanwhile, in a medium saucepan, bring the cream to a simmer.
10. Put the chocolate in a heatproof bowl and pour the hot cream on top.
11. Let stand for 3 minutes, then whisk until smooth.
12. Let the frosting stand at room temperature, stirring occasionally, until thick enough to spread, about 1 hour.
13. Let the cake cool in the pan for 10 minutes, then turn it out onto a rack; let cool completely.
14. Spread the frosting on the cake!

Tuesday, December 14, 2010
Holiday Fudge
My roommate's family strikes again! We made wonderful holiday fudge to give out as gifts: Uncle Scott's peanut butter fudge and Annie Erie's caramel icing (turned to fudge). Yum yum yum!
Uncle Scott's Peanut Butter Fudge
What You Need
- 2 cups white sugar
- 3/4 cup milk
- 4 tablespoons peanut butter
- 1 teaspoon vanilla
What You Do
1. Pour sugar, vanilla and milk into a small pot and heat, stirring constantly until 240-245 degrees (soft ball) on a candy thermometer.
2. Add in peanut butter and stir/beat well.
3. Spread fudge in a pan covered in wax paper and let cool.
4. Cut into desired size and shape.
Note: We added in some chocolate chips after stirring the peanut butter in well and just mixed it lightly for some chocolate-peanut butter fudge.
Annie Erie's Caramel Fudge
What You Need
- 1/2 cup salted butter (1 stick)
- 1 cup brown sugar
- 1/4 cup milk
- 2 1/2 cup confectioners sugar
What You Do
1. Melt butter in a medium pot.
2. Add brown sugar and bring to a boil.
3. Let butter and brown sugar mixture boil for 2-3 minutes (keep stirring).
4. Add milk and bring back to a boil.
5. Remove from heat and allow to cool a bit.
6. Beat in sifted confectioners sugar until spreadable.
7. Spread fudge in a pan covered in wax paper and let cool.
8. Cut into desired size and shape.
Note 1: We added some sea salt on top. It looks lovely and tastes delicious.
Note 2: Recipe was originally intended for caramel icing. So, to use as icing allow brown sugar and butter mixture to boil only 2 minutes and reduce confectioners sugar to 1 1/2 cups.


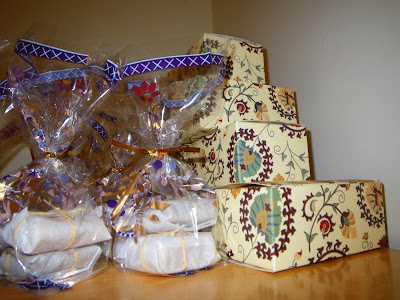 We wrapped each piece individually and put into festive boxes and bags.
Uncle Scott's Peanut Butter Fudge
What You Need
- 2 cups white sugar
- 3/4 cup milk
- 4 tablespoons peanut butter
- 1 teaspoon vanilla
What You Do
1. Pour sugar, vanilla and milk into a small pot and heat, stirring constantly until 240-245 degrees (soft ball) on a candy thermometer.
2. Add in peanut butter and stir/beat well.
3. Spread fudge in a pan covered in wax paper and let cool.
4. Cut into desired size and shape.
Note: We added in some chocolate chips after stirring the peanut butter in well and just mixed it lightly for some chocolate-peanut butter fudge.
Annie Erie's Caramel Fudge
What You Need
- 1/2 cup salted butter (1 stick)
- 1 cup brown sugar
- 1/4 cup milk
- 2 1/2 cup confectioners sugar
What You Do
1. Melt butter in a medium pot.
2. Add brown sugar and bring to a boil.
3. Let butter and brown sugar mixture boil for 2-3 minutes (keep stirring).
4. Add milk and bring back to a boil.
5. Remove from heat and allow to cool a bit.
6. Beat in sifted confectioners sugar until spreadable.
7. Spread fudge in a pan covered in wax paper and let cool.
8. Cut into desired size and shape.
Note 1: We added some sea salt on top. It looks lovely and tastes delicious.
Note 2: Recipe was originally intended for caramel icing. So, to use as icing allow brown sugar and butter mixture to boil only 2 minutes and reduce confectioners sugar to 1 1/2 cups.


 We wrapped each piece individually and put into festive boxes and bags.
Sunday, December 5, 2010
Best Donuts Ever: A Family Tradition
Today is the fourth day of Hanukkah. It has been a wonderful holiday so far and we are only in the middle! Part of what has made this holiday so special has been the two wonderful parties attended this weekend. And, the homemade donuts I made with my roommate.
While planning for Friday's Hanukkah Party, a friend of mine and I discussed important food groups to bring for the event, including Sufganiot (Hebrew for Jelly Donut). She asked, "Well, can you make them?" The idea had never crossed my mind. I figured I'd go to a bakery or Dunkin Donuts and pick some up. But, why, I wondered, was I so afraid of donuts?
I asked my roommate if she had any ideas. She said to me via email: "If you'd rather stick with a recipe you've already chosen, I totally understand, but below is my great grandmother's donut recipe."
How could you possibly go with another source if you have a family heirloom recipe?
We made them on Fri. night and again on Sat. Not only were they amazing (best donuts ever), they were a huge hit with all the guests at both parties and were surprisingly easy to make. Here is the recipe. Please try it! It is fun and a great way to impress friends and party-goers.

While planning for Friday's Hanukkah Party, a friend of mine and I discussed important food groups to bring for the event, including Sufganiot (Hebrew for Jelly Donut). She asked, "Well, can you make them?" The idea had never crossed my mind. I figured I'd go to a bakery or Dunkin Donuts and pick some up. But, why, I wondered, was I so afraid of donuts?
I asked my roommate if she had any ideas. She said to me via email: "If you'd rather stick with a recipe you've already chosen, I totally understand, but below is my great grandmother's donut recipe."
How could you possibly go with another source if you have a family heirloom recipe?
We made them on Fri. night and again on Sat. Not only were they amazing (best donuts ever), they were a huge hit with all the guests at both parties and were surprisingly easy to make. Here is the recipe. Please try it! It is fun and a great way to impress friends and party-goers.

Best Donuts Ever (aka Annie Erie's Donuts, from my roommate's great-grandmother Annie Erie)
What You Need
- 1 yeast cake (we defined this as 1 tablespoon yeast)
- 2-3 tablespoons warm water
- 1 tablespoon sugar
- 1/2 cup sugar
- 1/4 teaspoon nutmeg (use a bit less)
- 1/4 teaspoon cinnamon
- 1 egg
- 1 1/4 cups scalded milk (just heat it up in a small pot until it starts to steam)
- 4 1/2 cups flour
- 3 tablespoons butter
- 1/4 teaspoon salt
- 1.5 pints peanut oil (for frying but Annie Erie says "deep fat")
- 1/2 cup sugar for coating (add more as needed, you can also add a dash of cinnamon here too)
What You Need
- 1 yeast cake (we defined this as 1 tablespoon yeast)
- 2-3 tablespoons warm water
- 1 tablespoon sugar
- 1/2 cup sugar
- 1/4 teaspoon nutmeg (use a bit less)
- 1/4 teaspoon cinnamon
- 1 egg
- 1 1/4 cups scalded milk (just heat it up in a small pot until it starts to steam)
- 4 1/2 cups flour
- 3 tablespoons butter
- 1/4 teaspoon salt
- 1.5 pints peanut oil (for frying but Annie Erie says "deep fat")
- 1/2 cup sugar for coating (add more as needed, you can also add a dash of cinnamon here too)
What You Do
1. Heat up the milk.
2. Dissolve the yeast and 1 tablespoon sugar in warm water.
3. When milk is steaming, remove from heat and add to bowl. Let cool until lukewarm (you don't want to kill your yeast).
4. Add 1 1/2 cups flour and yeast mixture and beat well.
5. Let rise until bubbles burst on top (5 minutes). We didn't see many bubbles burst but we moved ahead after 5 minutes.
6. In a separate bowl, cream butter and sugar.
7. Add cinnamon, nutmeg, salt, and egg and beat well.
8. Add the creamed mixture to the batter and beat well (again!)
9. Add remaining flour and knead for 2 minutes.
 10. Let rise 1 hour.
11. Roll dough to about 1/2 inch thick.
 12. Cut dough into desired size and shape. We used small wine glasses to cut out small circles. To make the jelly donuts we took two circles and put jelly on one and covered it up (making a jelly sandwich). We then pinched the sides to close the donut. With the remaining dough, we made small round balls (which turn into donut holes). You can play with this and actually made donuts with holes in them (move out of the way Dunkin Donuts!) by making a circle and cutting out a hole in the middle.


 13. Let rise again for 30 minutes.
14. Heat up all the oil on medium heat in a small dutch oven.
15. "Fry in deep fat". Which means add one or two donuts (when the oil gets really hot, you can add 3-4 at a time) into hot oil and then let them get golden brown on all sides. Sometimes they will turn over on their own, but you may have to move them around.

 16. When golden, remove from oil and let drain on a cooling rack (wire-mesh rack). It's a good idea to put something under the rack to catch the oil.
17. When cool(ish), shake in a bag of sugar (we used a plastic container). You can use powdered sugar, regular sugar, or a cinnamon and sugar mixture! We used regular sugar on the jelly donuts and a cinnamon and sugar mixture on the donut holes.

Share with friends and family this holiday season! Also, don't forget to save your oil for another frying adventure.
1. Heat up the milk.
2. Dissolve the yeast and 1 tablespoon sugar in warm water.
3. When milk is steaming, remove from heat and add to bowl. Let cool until lukewarm (you don't want to kill your yeast).
4. Add 1 1/2 cups flour and yeast mixture and beat well.
5. Let rise until bubbles burst on top (5 minutes). We didn't see many bubbles burst but we moved ahead after 5 minutes.
6. In a separate bowl, cream butter and sugar.
7. Add cinnamon, nutmeg, salt, and egg and beat well.
8. Add the creamed mixture to the batter and beat well (again!)
9. Add remaining flour and knead for 2 minutes.
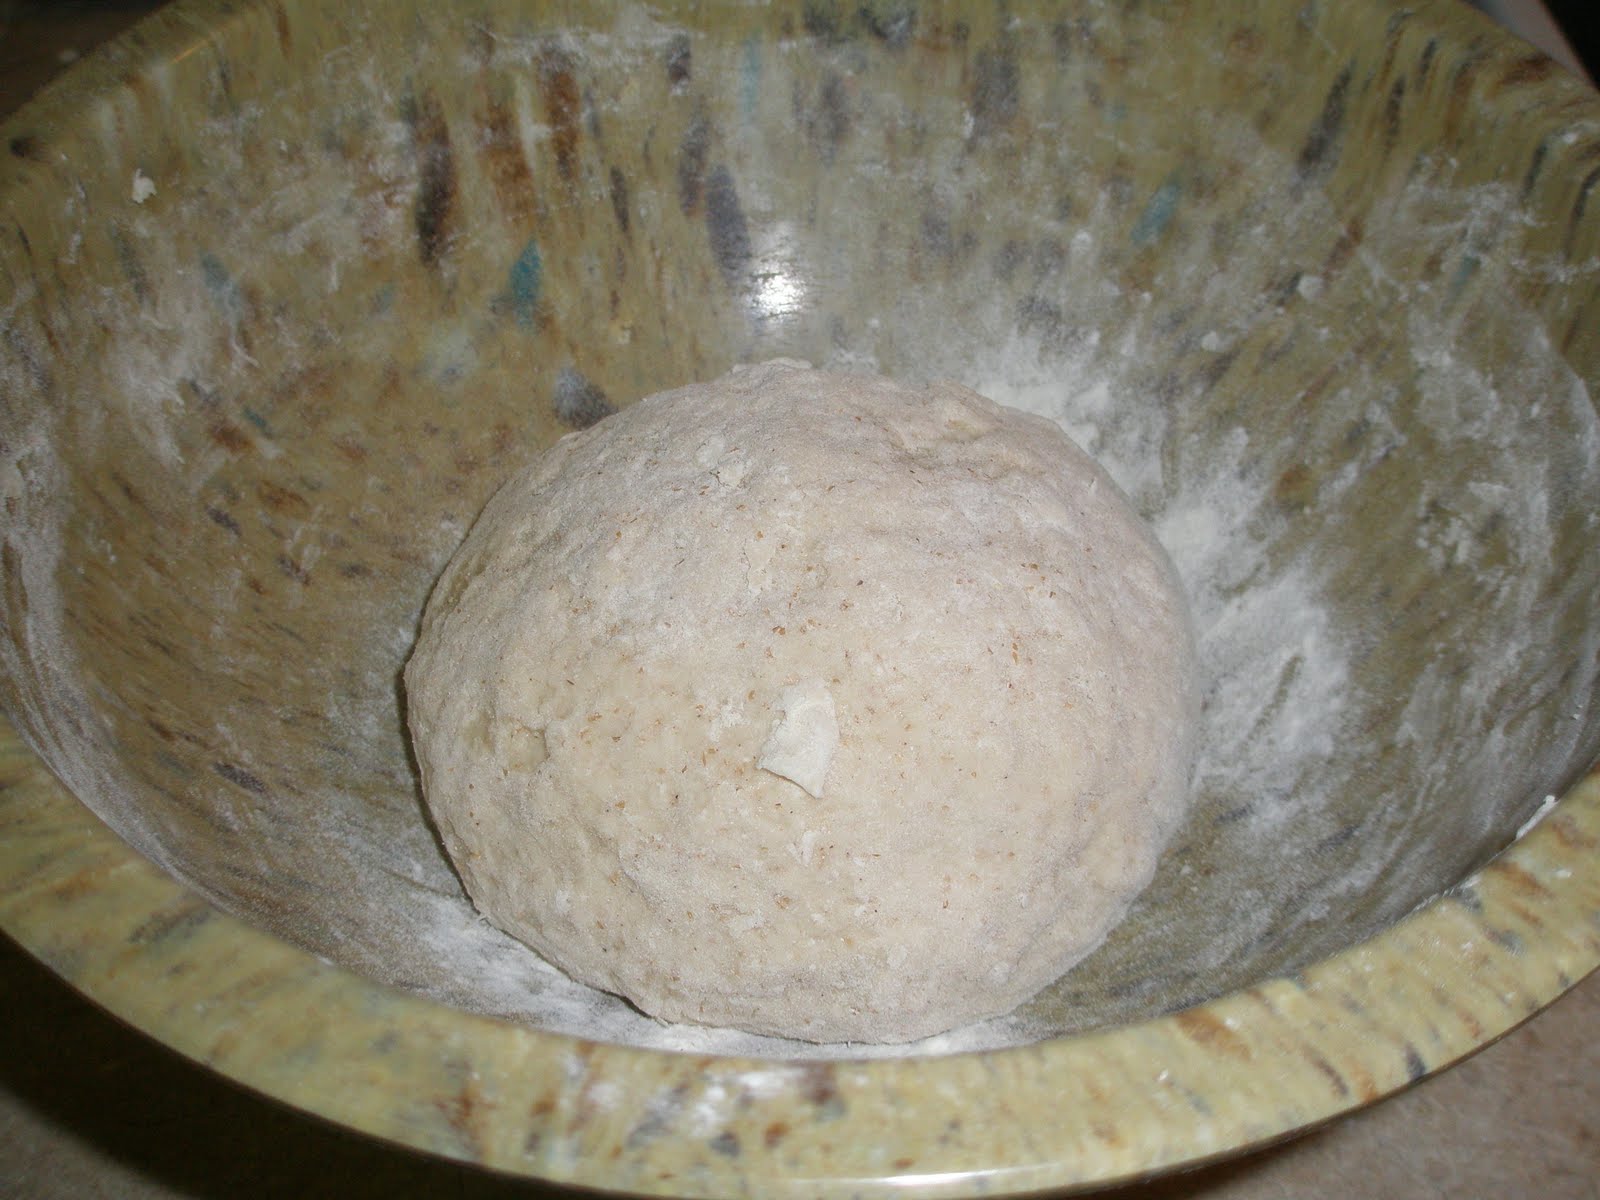 10. Let rise 1 hour.
11. Roll dough to about 1/2 inch thick.
 12. Cut dough into desired size and shape. We used small wine glasses to cut out small circles. To make the jelly donuts we took two circles and put jelly on one and covered it up (making a jelly sandwich). We then pinched the sides to close the donut. With the remaining dough, we made small round balls (which turn into donut holes). You can play with this and actually made donuts with holes in them (move out of the way Dunkin Donuts!) by making a circle and cutting out a hole in the middle.


 13. Let rise again for 30 minutes.
14. Heat up all the oil on medium heat in a small dutch oven.
15. "Fry in deep fat". Which means add one or two donuts (when the oil gets really hot, you can add 3-4 at a time) into hot oil and then let them get golden brown on all sides. Sometimes they will turn over on their own, but you may have to move them around.

 16. When golden, remove from oil and let drain on a cooling rack (wire-mesh rack). It's a good idea to put something under the rack to catch the oil.
17. When cool(ish), shake in a bag of sugar (we used a plastic container). You can use powdered sugar, regular sugar, or a cinnamon and sugar mixture! We used regular sugar on the jelly donuts and a cinnamon and sugar mixture on the donut holes.

Wednesday, May 12, 2010
Strawberry Rhubarb Pie
As you have probably guessed, I love the springtime. If only the weather here in DC would cooperate. At the farmer's market last weekend, I picked up some of the first strawberrys of the season and two bunches of rhubarb. The result: a wonderful pie perfect when eaten with vanilla ice cream.
Strawberry Rhubarb Pie (adapted from PieChef)
What You Need
- 2 9” pie crusts
- 2 cups strawberries, hulled and sliced (I didn't measure this out. I just used about double the rhubarb as I did strawberries)
- 4 cups rhubarb, sliced (again, I didn't measure this. I just used the container of strawberries plus two bunches of rhubarb.)
- 1 cup sugar (I was very generous here)
- 1/2 cup flour
- Dash of cinnamon
- Dash of brown sugar
What You Do
1. Preheat oven to 425 degrees F.
2. Clean and slice fruit and combine in large bowl.
3. Mix sugar and flour in small bowl. Add cinnamon.
4. Add sugar and flour mixture to fruit and stir to mix. Let the fruit mixture sit for about 10 minutes so the juices release.
5. Pour the filling evenly into the crust.
6. Top with second crust and make a couple slits in the top.
7. Bake for 10 minutes at 425, then lower heat to 325 and bake for an additional 30-40 minutes. (I had to let it bake for a bit more time, until the crust looked nicely browned).
I forgot how delicious and easy this pie is. Please try it out!
Strawberry Rhubarb Pie (adapted from PieChef)
What You Need
- 2 9” pie crusts
- 2 cups strawberries, hulled and sliced (I didn't measure this out. I just used about double the rhubarb as I did strawberries)
- 4 cups rhubarb, sliced (again, I didn't measure this. I just used the container of strawberries plus two bunches of rhubarb.)
- 1 cup sugar (I was very generous here)
- 1/2 cup flour
- Dash of cinnamon
- Dash of brown sugar
What You Do
1. Preheat oven to 425 degrees F.
2. Clean and slice fruit and combine in large bowl.
3. Mix sugar and flour in small bowl. Add cinnamon.
4. Add sugar and flour mixture to fruit and stir to mix. Let the fruit mixture sit for about 10 minutes so the juices release.
5. Pour the filling evenly into the crust.
6. Top with second crust and make a couple slits in the top.
7. Bake for 10 minutes at 425, then lower heat to 325 and bake for an additional 30-40 minutes. (I had to let it bake for a bit more time, until the crust looked nicely browned).
I forgot how delicious and easy this pie is. Please try it out!
Monday, February 8, 2010
Sweet Treats
After the Jambalaya was simmering, I got started with some chocolate chip cookies. This recipe was fantastic and I think I will be sticking with it for a long time. The cookies turned out soft and sweet! They were a great hit for the Superbowl yesterday as well.
Classic Chocolate Chip Cookies(from Bittman's How to Cook Everything)
What You Need
-2 sticks butter
-3/4 cup brown sugar
-3/4 cup granulated sugar
-2 eggs
-2 cups flour
-1/2 tsp salt
-1/2 tsp baking soda
-1 tsp vanilla
-2 cups chocolate chips
What You Do
1. Preheat oven to 375 F
2. Using an electric mixer, cream together the butter and sugars; add the eggs one at a time and beat until well blended. (By the way, I hate using the electric mixer and only do so for a short time and then resorted to working by hand. It gets the butter and sugar everywhere!)
3. Combine the flour, baking soda, and salt in a bowl and add them to the batter by hand, stirring to blend. Stir in the vanilla and then the chocolate chips.
4. Drop by tablespoons onto ungreased baking sheets and bake until lightly browned about 10 minutes.
Share with friends, and eat with a glass of milk.
Classic Chocolate Chip Cookies(from Bittman's How to Cook Everything)
What You Need
-2 sticks butter
-3/4 cup brown sugar
-3/4 cup granulated sugar
-2 eggs
-2 cups flour
-1/2 tsp salt
-1/2 tsp baking soda
-1 tsp vanilla
-2 cups chocolate chips
What You Do
1. Preheat oven to 375 F
2. Using an electric mixer, cream together the butter and sugars; add the eggs one at a time and beat until well blended. (By the way, I hate using the electric mixer and only do so for a short time and then resorted to working by hand. It gets the butter and sugar everywhere!)
3. Combine the flour, baking soda, and salt in a bowl and add them to the batter by hand, stirring to blend. Stir in the vanilla and then the chocolate chips.
4. Drop by tablespoons onto ungreased baking sheets and bake until lightly browned about 10 minutes.
Share with friends, and eat with a glass of milk.
Sunday, December 27, 2009
Holiday Candies

I made holiday caramel and toffee candies inspired by Food and Wine Magazine over the holiday. It was a fun adventure, as I never made candy before. I wrapped them up and will be giving them out as gifts to help people get through holiday withdrawal over the next week.
Chocolate-Almond Toffee (from Food and Wine)
What You Need:
- 2 sticks unsalted butter
- 1 1/2 cups sugar
- 2 tablespoons water
- 1 cup salted roasted almonds—3/4 cup coarsely chopped, 1/4 cup finely chopped
- 1 tablespoon vanilla extract
- 1 1/2 teaspoons coarse sea salt, crumbled
- 1/2 pound bittersweet chocolate, chopped
What You Do:
1. Line an 8-by-11-inch baking pan with foil.
2. Spray the foil with vegetable oil.
3. In a heavy saucepan, melt the butter.
4. Stir in the sugar and water and bring to a boil.
5. Cook over moderate heat, stirring with a wooden spoon, until a deeply golden caramel forms and the temperature reaches 300° on a candy thermometer, 15 minutes. Note: if the sugar and butter separate, stir vigorously to blend (this happened to me, pretty scary and not sure the toffee truly recovered!).
6. Remove from the heat and add the coarsely chopped almonds, vanilla and salt.
7. Scrape the toffee into the prepared pan; let cool for 10 minutes.
8. Sprinkle half of the chocolate over the toffee and let stand until melted.
9. Spread the chocolate over the toffee and sprinkle with half of the finely chopped almonds.
10. Freeze the toffee for 10 minutes.
11. Invert the toffee onto a foil-lined baking sheet and peel off the foil backing.
12. In a microwave safe bowl, melt the remaining chocolate.
13. Spread the melted chocolate over the top of the toffee and sprinkle with the remaining finely chopped almonds.
14. Let the toffee cool, then break into shards.
Chocolate-Dipped Vanilla Caramels (from Food and Wine)
What You Need:
- 2 sticks unsalted butter
- 2 1/2 cups granulated sugar
- 1 cup light corn syrup
- 1 cup heavy cream
- 1 vanilla bean, split and seeds scraped
- Coarse sea salt, crumbled
- 1 pound bittersweet chocolate, melted (optional)
What You Do:
1. Line a 9-by-13-inch pan with foil; spray it with vegetable oil.
2. In a heavy saucepan, melt the butter.
3. Add the sugar, corn syrup and cream and bring to a boil, stirring until the sugar dissolves.
4. Add the vanilla seeds. (They smell so good!)
5. Cook over moderately low heat, stirring, until a golden caramel forms and the temperature reaches 245° on a candy thermometer, 1 hour.
6. Stir in 1 tablespoon of salt and scrape the caramel into the prepared pan.
7. Let cool and set completely overnight.
8. Lightly oil a sheet of parchment paper and line 2 baking sheets with wax paper.
9. Invert the caramel onto the parchment and peel off the foil. (This is the easy part)

10. Using a sharp knife, cut the caramel into 1-inch-wide strips and then into 1-inch squares. (This is the hard part! It took me awhile to get these cut up!)
11. Dip the squares into the chocolate, tap off the excess and transfer to the wax paper on the baking sheets.
12. Sprinkle lightly with sea salt and refrigerate for 10 minutes.
OR:
11. Alternatively, wrap the plain caramel squares in wax paper and tie with thread.
Wednesday, October 7, 2009
Apples Apples Everywhere
I made the first pie out of the apples I picked last week. It turned out well, but I will be trying it again with my own crust this weekend and will post again at that time. I thought I'd share the success on this one though:

It smells amazing.
It smells amazing.
Tuesday, October 6, 2009
Homemade Applesauce
This past weekend was perfect for apple picking. The weather was glorious and sky was clear. I was interested in trying my own applesauce. It was fun and smelled amazing!
I combined two recipes I found online: Sarah's Applesauce and Homemade Applesauce.
 What You Do:
 2. Lower heat and simmer for 20-30 minutes.
3. Remove from heat and remove lemon peels.
I combined two recipes I found online: Sarah's Applesauce and Homemade Applesauce.
Applesauce
What You Need:
- 12 apples - peeled, cored and quartered
- 2-1/4 cups water
- 1-1/2 teaspoons ground cinnamon
- 2-1/4 cups water
- 1-1/2 teaspoons ground cinnamon
- 4 strips of lemon peel
- Juice of half a lemon
- 1/4 cup of dark brown sugar (or more, depending on your sweet tooth)
- up to 1/4 cup of white sugar
- 1/2 teaspoon of salt
- Juice of half a lemon
- 1/4 cup of dark brown sugar (or more, depending on your sweet tooth)
- up to 1/4 cup of white sugar
- 1/2 teaspoon of salt
What You Do:1. Put all ingredients into a large pot and bring to boil.
2. Lower heat and simmer for 20-30 minutes.3. Remove from heat and remove lemon peels.
4. Mash with spoon or potato masher (if you should have one, I do not).
5. Enjoy and share with friends this fall!
5. Enjoy and share with friends this fall!
I shared this post with Food Renegade's Fight Back Friday. Please check out all the posts there for lots of SOLE, real food!
Wednesday, May 27, 2009
Memorial Day Cooking
In addition to gardening, I spent some time during the holiday weekend to prepare a fun meal! We made ribs, collard greens, salad, and strawberry-rhubarb pie. Sunday was the first day of strawberries at the Dupont Circle farmer's market and also my first day taking the risk and buying some rhubarb.
I looked in How to Cook Everything by Bittman to get some ideas about the pie, but then decided to go online. Since I only wanted to use what I had on hand, I finally found a simple recipe that didn't call for cornstarch or vanilla (I didn't have either of these available). I found piechef.com and used it as my inspiration.
I started with the following:
I looked in How to Cook Everything by Bittman to get some ideas about the pie, but then decided to go online. Since I only wanted to use what I had on hand, I finally found a simple recipe that didn't call for cornstarch or vanilla (I didn't have either of these available). I found piechef.com and used it as my inspiration.
I started with the following:
- 2 9” pie cursts (I purchased them frozen from Whole Foods, but next time would prefer to make my own)
- 2 cups strawberries, hulled and cut in half
- 4 cups rhubarb, washed and cut in one inch pieces
- 1 cup brown sugar (maybe a bit more)
- 1/2 cup flour
- 1 egg mixed with 2 tbl water
 Here is what I did:
- Preheat oven to 425 degrees.
- Clean and cut the fruit, mixing in large bowl.
- Mix sugar and flour in small bowl.
- Add sugar and flour mixture to fruit and stir to mix.
- Let the mixture of fruit and sugar sit for around 15 minutes.

- Pour the filling into one of the pie crusts.
- Place second pie crust on top of the pie carefully.
- Brush with egg mixture.
- Sprinkle with powdered sugar.

- Bake for 10 minutes at 425 degrees.
- Lower heat to 325 and bake for an additional 40 minutes.

- Let cool and enjoy!
The pie turned out wonderfully, as well as the rest of the dinner. It was a perfect way to start off the summer.
Subscribe to:
Posts (Atom)