I wanted to make baguettes at home for Christmas dinner. So, I turned to French Women Don't Get Fat for the recipe. They were wonderful and not to hard to make.
Baguettes (from French Women Don't Get Fat)
What You Need
- 4-5 cups cake flour
- 1 teaspoon dry yeast
- 2 cups warm water
- 2 teaspoons kosher salt
What You Do
1. In a small bowl dissolve yeast in ½ cup warm water using a fork.
2. Set yeast mixture aside for 10 minutes.
3. Combine flour and salt.
4. Add yeast mixture and stir in remaining 1½ cup water.
5. Mix until sticky enough to knead.
6. Knead for 6-10 minutes; dough should be sticky and smooth.
7. Put in a bowl, cover with a damp cloth, and let rise at room temperature until doubled in volume (1 hour).
8. Punch down and divide into 4 pieces.
9. Roll each into a ball and shape into a baguette.
10. Transfer to slightly greased baking sheet and let rise until nearly doubled.
11. Brush with mixture of one beaten egg and one tablespoon water.
12. Score diagonally with sharp knife.
13. Pour two cups of hot water in a pan and place in preheated 450° F oven. (I didn't do this, but I think it would be good!)
14. Bake the baguettes for 15 minutes then lower temperature to 400° F and bake for 10 minutes until golden brown.
15. Remove and cool on a rack before slicing.
So good and not too difficult.
Sunday, December 26, 2010
Christmas Weekend
I hope you all had a wonderful holiday. My sister and I spent a low-key weekend here in the Washington D.C. area with some friends. For Christmas Eve, we went to a great restaurant in Eastern Market, Belga Cafe. It was perfect!
On Christmas Day, we spent the day watching movies, playing with Logan, and cooking. Our Christmas Dinner included the following:
- Baguette(s)
- Roasted Garlic
- Red-Green Salad with Vinaigrette
- Roasted Cauliflower
- Vegetarian Lasagna (same recipe from Christmas dinner last year)
- Winter Fruit Salad (from Smitten Kitchen)
I'm looking forward to the snow and enjoying the rest of the weekend! Hope you are too.
Wednesday, December 22, 2010
Peanut Noodles
Warm peanut noodles! It is one of my favorite appetizers at a Chinese restaurant I go to with my family up in New Jersey. I've tried to make it at home before and it was terrible. My roommate made a great one and told me the secret: adding in hot water to get the sauce just right! I've finally made it myself based on Bittman's recipe.
Peanut Noodles (adapted from Bittman's How to Cook Everything Vegetarian)
What You Need
- 12 ounces long Asian noodles (I used pad Thai noodles) or fresh Chinese egg noodles
- 2 tablespoons sesame oil
- 1/2 cup peanut butter
- 2 tablespoons sugar
- 3 tablespoons soy sauce, or to taste
- 1 teaspoon minced ginger, optional
- 1 tablespoon rice or wine vinegar
- Hot sesame oil or Tabasco sauce to taste
- 1/2 teaspoon freshly ground black pepper, or more
- 1/2 cup hot water
- At least 1/2 cup minced scallions for garnish
What You Do
1. Depending on the noodles you are using, follow the directions on the package. But, usually: soak for 30 minutes.
2. Drain noodles.
3. Add boiling water and let soak for 5 minutes.
4. While noodles are cooking, whisk together sesame oil and paste, sugar, soy, ginger, vinegar, hot oil and pepper in a large bowl.
5. Thin sauce with hot water, so that it is about the consistency of heavy cream; you will need 1/4 to 1/2 cup.
6. When noodles are done, drain.
7. Toss noodles and sauce (there are other things you can add here like chicken, tofu, or cucumbers- be creative).
8. Taste and adjust seasoning as necessary (the dish may need salt), then garnish and serve.
This dish is good cold, warm, or even hot!
Chocolate-Red Wine Cake
 A very celebratory dessert. My roommate took the lead on this one, but it was too good not to share with you. This cake started with my roommate and I drooling over the cover of December's Bon Appetit and the pictured Spiced Chocolate Torte Wrapped in Chocolate Ribbons. Go check out the link immediately and come back.
Back?
So, the torte was a bit elaborate for us pre-finals so I found an amazing alternative. We even went out to get a bundt pan for the occasion.
Chocolate-Red Wine Cake (adapted from Food and Wine and this one too)
What You Need
- 2 cups all-purpose flour
- 3/4 cup unsweetened cocoa powder
- 1 1/4 teaspoons baking soda
- 1/2 teaspoon salt
- 2 sticks unsalted butter, softened
- 1 3/4 cups sugar
- 2 large eggs
- 1 teaspoon pure vanilla extract
- 1 1/4 cups dry red wine
- 3/4 cup heavy cream
- 3/4 cup milk chocolate chips/chopped
Variation: The original recipe called the cake to be served with confectioner's sugar (for dusting the finished cake) and whipped cream. We opted for a chocolate icing. Of course, the choice is yours depending on how luscious you are feeling.
What You Do
1.Preheat the oven to 350°.
2. Butter and flour a 12-cup bundt pan.
3. In a bowl, whisk the flour, cocoa powder, baking soda and salt.
4. In a large bowl, using a handheld electric mixer, beat the butter with the sugar at medium-high speed until fluffy, 4 minutes.
5. Add the eggs, one at a time, and beat until incorporated.
6. Add the vanilla and beat for 2 minutes longer.
7. Working in two batches, alternately fold in the dry ingredients and the wine, until just incorporated.
8. Scrape the batter into the prepared pan, and bake for 45 minutes, until a toothpick inserted in the center comes out clean.
9. Meanwhile, in a medium saucepan, bring the cream to a simmer.
10. Put the chocolate in a heatproof bowl and pour the hot cream on top.
11. Let stand for 3 minutes, then whisk until smooth.
12. Let the frosting stand at room temperature, stirring occasionally, until thick enough to spread, about 1 hour.
13. Let the cake cool in the pan for 10 minutes, then turn it out onto a rack; let cool completely.
14. Spread the frosting on the cake!

Pumpkin Chowder
I really like this recipe. I found it when I was browsing through Williams-Sonoma a couple years ago near the register. I used to cook this chowder using the bacon recommended in the recipe, but now have taken the bacon out. The vegetarian version is very good, but of course bacon gives it something extra special. I've done it as a butternut squash chowder (as in the original recipe) as well as a pumpkin chowder. Both are delicious!
Pumpkin Chowder (adapted from Williams-Sonoma)
What You Need
- 2 tbs. olive oil
- 1 yellow onion, diced
- 2 celery stalks, diced
- 1 bay leaf
- 1 tsp. chopped fresh sage, plus small sage leaves for garnish
- 4 tsp. kosher salt, plus more, to taste
- 1 tsp. freshly ground pepper, plus more, to taste
- 2 russet potatoes, peeled and cut into 1/2-inch cubes
- 1/4 cup white wine
- 3 cups vegetable broth
- 4 cups pumpkin (or butternut squash) puree
- 1/2 cup heavy cream
Optional: replace 2 tbs. olive oil with 4 bacon slices, cut into 1/2-inch pieces
What You Do
1. If you are using bacon: cook the bacon in a large Dutch oven over medium heat, until crispy, about 5 minutes. Using a slotted spoon, transfer the bacon to a paper towel lined plate. Set aside. Pour off all but 1 Tbs. of the fat from the pan and return the pan to medium heat.
2. If no bacon: heat the olive oil.
3. Add the onion, celery, bay leaf, chopped sage, the 4 tsp. salt and the 1 tsp. pepper and cook, stirring occasionally, just until the vegetables are soft, 5 to 6 minutes.
4. Stir in the potatoes, cover and cook, stirring occasionally, for 3 minutes.
5. Add the wine and simmer, stirring to scrape up the browned bits, for 1 to 2 minutes.
6. Add the broth and bring just to a boil.
7. Reduce the heat to low and gently simmer until the potatoes are tender, about 12 minutes.
8. Add the puree (and bacon if you are using it) and simmer for 5 minutes.
9. Stir in the cream and adjust the seasonings with salt and pepper.
10. Remove the bay leaf and discard.
11. Ladle the chowder into warmed bowls and garnish with sage leaves. Serve immediately. Serves 6 to 8.
Tip from Williams-Sonoma: Make the soup (withholding the cream) up to 1 day in advance. Cool to room temperature, then cover and refrigerate until just before serving time. When reheating the soup, stir in the cream.
Very filling and yummy!
Tuesday, December 14, 2010
Holiday Fudge
My roommate's family strikes again! We made wonderful holiday fudge to give out as gifts: Uncle Scott's peanut butter fudge and Annie Erie's caramel icing (turned to fudge). Yum yum yum!
Uncle Scott's Peanut Butter Fudge
What You Need
- 2 cups white sugar
- 3/4 cup milk
- 4 tablespoons peanut butter
- 1 teaspoon vanilla
What You Do
1. Pour sugar, vanilla and milk into a small pot and heat, stirring constantly until 240-245 degrees (soft ball) on a candy thermometer.
2. Add in peanut butter and stir/beat well.
3. Spread fudge in a pan covered in wax paper and let cool.
4. Cut into desired size and shape.
Note: We added in some chocolate chips after stirring the peanut butter in well and just mixed it lightly for some chocolate-peanut butter fudge.
Annie Erie's Caramel Fudge
What You Need
- 1/2 cup salted butter (1 stick)
- 1 cup brown sugar
- 1/4 cup milk
- 2 1/2 cup confectioners sugar
What You Do
1. Melt butter in a medium pot.
2. Add brown sugar and bring to a boil.
3. Let butter and brown sugar mixture boil for 2-3 minutes (keep stirring).
4. Add milk and bring back to a boil.
5. Remove from heat and allow to cool a bit.
6. Beat in sifted confectioners sugar until spreadable.
7. Spread fudge in a pan covered in wax paper and let cool.
8. Cut into desired size and shape.
Note 1: We added some sea salt on top. It looks lovely and tastes delicious.
Note 2: Recipe was originally intended for caramel icing. So, to use as icing allow brown sugar and butter mixture to boil only 2 minutes and reduce confectioners sugar to 1 1/2 cups.


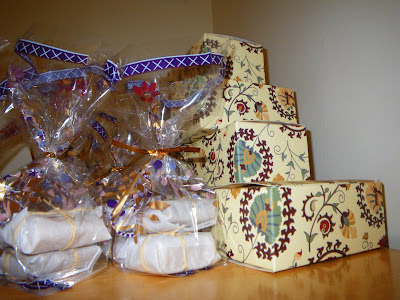 We wrapped each piece individually and put into festive boxes and bags.
 Saturday, December 11, 2010
Beet Risotto
It's possible that I should change the title of the blog to something related to risotto because I've posted so many risotto recipes. But here is another great one! Beets! I found the recipe in one of my Food and Wine cookbooks and cut it in half (the original recipe called for 3 cups arborio rice, too much for me!).
Beet Risotto (adapted from Food and Wine)
What You Need
- 3-4 cups vegetable stock
- 3 tablespoons unsalted butter
- 1 medium sweet onion, finely chopped
- 2 beets , peeled and coarsely shredded, plus thinly sliced beets for garnish
- 1 1/2 cups arborio rice
- 1/2 cup white wine
- 3/4 cup young pecorino cheese, freshly grated (I used parmesan)
- 2 teaspoons poppy seeds, plus more for garnish (I didn't have any, but I think it would be nice looking with them)
What You Do
1.In a saucepan, bring the stock to a simmer; cover and keep warm.
2. In a medium enameled cast-iron casserole, melt the butter.
3. Add the onion and cook over moderately high heat, stirring, until softened, 5 minutes.
4. Add the shredded beets and cook, stirring, until the pan is dry, 12 minutes.
5. Spoon half of the beets into a small bowl.
6. Add the rice to the casserole and stir.
7. Add white wine and cook, stirring until wine is gone (2 minutes).
8. Add 1 cup of the warm stock to the rice and cook over moderate heat, stirring, until the stock is nearly absorbed.
9. Continue adding the stock 1 (or half) cup at a time, stirring constantly, until the rice is al dente and a thick sauce forms, 22 minutes.
10. Stir in the cooked beets, cheese and the 2 teaspoons of poppy seeds (if you have them).
11. Cook, stirring, until heated through; add a few tablespoons of water if the risotto is too thick.
12. Spoon the risotto into bowls. Garnish with sliced beets and poppy seeds and serve.
 Crazy color! But delicious.
Sunday, December 5, 2010
Best Donuts Ever: A Family Tradition
Today is the fourth day of Hanukkah. It has been a wonderful holiday so far and we are only in the middle! Part of what has made this holiday so special has been the two wonderful parties attended this weekend. And, the homemade donuts I made with my roommate.
While planning for Friday's Hanukkah Party, a friend of mine and I discussed important food groups to bring for the event, including Sufganiot (Hebrew for Jelly Donut). She asked, "Well, can you make them?" The idea had never crossed my mind. I figured I'd go to a bakery or Dunkin Donuts and pick some up. But, why, I wondered, was I so afraid of donuts?
I asked my roommate if she had any ideas. She said to me via email: "If you'd rather stick with a recipe you've already chosen, I totally understand, but below is my great grandmother's donut recipe."
How could you possibly go with another source if you have a family heirloom recipe?
We made them on Fri. night and again on Sat. Not only were they amazing (best donuts ever), they were a huge hit with all the guests at both parties and were surprisingly easy to make. Here is the recipe. Please try it! It is fun and a great way to impress friends and party-goers.

Best Donuts Ever (aka Annie Erie's Donuts, from my roommate's great-grandmother Annie Erie)
What You Need
- 1 yeast cake (we defined this as 1 tablespoon yeast)
- 2-3 tablespoons warm water
- 1 tablespoon sugar
- 1/2 cup sugar
- 1/4 teaspoon nutmeg (use a bit less)
- 1/4 teaspoon cinnamon
- 1 egg
- 1 1/4 cups scalded milk (just heat it up in a small pot until it starts to steam)
- 4 1/2 cups flour
- 3 tablespoons butter
- 1/4 teaspoon salt
- 1.5 pints peanut oil (for frying but Annie Erie says "deep fat")
- 1/2 cup sugar for coating (add more as needed, you can also add a dash of cinnamon here too)
What You Do
1. Heat up the milk.
2. Dissolve the yeast and 1 tablespoon sugar in warm water.
3. When milk is steaming, remove from heat and add to bowl. Let cool until lukewarm (you don't want to kill your yeast).
4. Add 1 1/2 cups flour and yeast mixture and beat well.
5. Let rise until bubbles burst on top (5 minutes). We didn't see many bubbles burst but we moved ahead after 5 minutes.
6. In a separate bowl, cream butter and sugar.
7. Add cinnamon, nutmeg, salt, and egg and beat well.
8. Add the creamed mixture to the batter and beat well (again!)
9. Add remaining flour and knead for 2 minutes.
 10. Let rise 1 hour.
11. Roll dough to about 1/2 inch thick.
 12. Cut dough into desired size and shape. We used small wine glasses to cut out small circles. To make the jelly donuts we took two circles and put jelly on one and covered it up (making a jelly sandwich). We then pinched the sides to close the donut. With the remaining dough, we made small round balls (which turn into donut holes). You can play with this and actually made donuts with holes in them (move out of the way Dunkin Donuts!) by making a circle and cutting out a hole in the middle.


 13. Let rise again for 30 minutes.
14. Heat up all the oil on medium heat in a small dutch oven.
15. "Fry in deep fat". Which means add one or two donuts (when the oil gets really hot, you can add 3-4 at a time) into hot oil and then let them get golden brown on all sides. Sometimes they will turn over on their own, but you may have to move them around.

 16. When golden, remove from oil and let drain on a cooling rack (wire-mesh rack). It's a good idea to put something under the rack to catch the oil.
17. When cool(ish), shake in a bag of sugar (we used a plastic container). You can use powdered sugar, regular sugar, or a cinnamon and sugar mixture! We used regular sugar on the jelly donuts and a cinnamon and sugar mixture on the donut holes.

Share with friends and family this holiday season! Also, don't forget to save your oil for another frying adventure.
1. Heat up the milk.
2. Dissolve the yeast and 1 tablespoon sugar in warm water.
3. When milk is steaming, remove from heat and add to bowl. Let cool until lukewarm (you don't want to kill your yeast).
4. Add 1 1/2 cups flour and yeast mixture and beat well.
5. Let rise until bubbles burst on top (5 minutes). We didn't see many bubbles burst but we moved ahead after 5 minutes.
6. In a separate bowl, cream butter and sugar.
7. Add cinnamon, nutmeg, salt, and egg and beat well.
8. Add the creamed mixture to the batter and beat well (again!)
9. Add remaining flour and knead for 2 minutes.
 10. Let rise 1 hour.
11. Roll dough to about 1/2 inch thick.
 12. Cut dough into desired size and shape. We used small wine glasses to cut out small circles. To make the jelly donuts we took two circles and put jelly on one and covered it up (making a jelly sandwich). We then pinched the sides to close the donut. With the remaining dough, we made small round balls (which turn into donut holes). You can play with this and actually made donuts with holes in them (move out of the way Dunkin Donuts!) by making a circle and cutting out a hole in the middle.

 13. Let rise again for 30 minutes.
14. Heat up all the oil on medium heat in a small dutch oven.
15. "Fry in deep fat". Which means add one or two donuts (when the oil gets really hot, you can add 3-4 at a time) into hot oil and then let them get golden brown on all sides. Sometimes they will turn over on their own, but you may have to move them around.

 16. When golden, remove from oil and let drain on a cooling rack (wire-mesh rack). It's a good idea to put something under the rack to catch the oil.
17. When cool(ish), shake in a bag of sugar (we used a plastic container). You can use powdered sugar, regular sugar, or a cinnamon and sugar mixture! We used regular sugar on the jelly donuts and a cinnamon and sugar mixture on the donut holes.

Sunday, November 28, 2010
Pumpkin Risotto
Not like I need another thing to love about Thanksgiving, but in addition to all the glory that is the Thanksgiving holiday, my mother also sends me home with plenty of food. Not just leftovers, but also extra ingredients. This year, like all others, I made out like a bandit: brown sugar, stuffed grape leaves, cheese, pie, and pumpkins! A whole pumpkin and also a container of pumpkin puree. I was excited to try uses for my pumpkins and thought of pumpkin risotto and -wow- it is amazing!
Pumpkin Risotto with Roasted Vegetables (adapted from Straight from the Farm)
What You Need
- 3-4 cups vegetable stock (you can also use chicken stock)
- 3 tablespoons butter
- 1 medium onion, chopped
- 1 1/2 cup aborrio rice
- 1/2 cup white wine
- 1/2 teaspoon finely minced fresh rosemary
- 1/4 teaspoon freshly grated nutmeg
- 1 1/2 cup pumpkin puree
- 2 cups roasted vegetables (I used a combination of sweet potato, carrots, and orange cauliflower sprinkled with olive oil and salt and roasted at 400 degrees for 25 minutes)
- 1/2 cup freshly grated parmesan cheese
- 2 tablespoons heavy cream
- freshly ground black pepper and salt to taste
What You Do
1. If you need to, first prepare your pumpkin puree (see here: The Pioneer Woman)
2. Cut up your vegetables and toss with olive oil and some salt.
3. Put vegetables in a pre-heated 400 degree oven and roast for 25 minutes.
4. While the vegetables are roasting, begin to work on the risotto.
5. Put the vegetable stock in a medium saucepan over low heat to come to a simmer.
6. Melt the butter in a large heavy saucepan over medium heat.
7. When it is melted, add the onion and cook until translucent, about 4 minutes.
8. Add the rice and stir for about two minutes so it can absorb the butter and toast a bit.
9. Add the wine and let everything simmer for another minute or two until the wine is absorbed.
10. Set a timer for 18 minutes. Add about half a cup of hot stock to the risotto and stir constantly until it is absorbed.
11. Add another half cup of stock and repeat this process until 18 minutes is up.
12. Add the pumpkin puree, nutmeg, rosemary and a final half cup of stock and stir vigorously to combine.
13. When risotto has once again become thick and creamy (don't worry, this does happen!), add the roasted veggies and grated cheese and stir again to combine.
14. Finally, finish the risotto by stirring in the heavy cream and adding pepper and salt to taste.
15. Serve immediately while hot, garnishing with addition grated cheese and a sprig of rosemary on each plate if you have it.
This was a great meal to help me transition from the Thanksgiving holiday to the final three weeks of the semester.
Thanksgiving: Sides (Brussels Sprouts)
In the end, the only new addition to our Thanksgiving meal was the new variation of brussels sprouts. The rest of the recipes have already been posted to the blog! I love brussels sprouts and I also love balsamic vinegar. Together, as in this recipe, they are amazing.
Brussels Sprouts with Balsamic Vinegar and Caramalized Onions (adapted from Martha Stewart)
What You Need
- 1.5 pounds brussels sprouts
- Salt and freshly ground black pepper
- 2 tablespoon unsalted butter
- 2 tablespoon olive oil
- 2 small red onion, thinly sliced lengthwise
- 4 tablespoons balsamic vinegar
What You Do
1. Trim outer leaves and stems from brussels sprouts, and discard.
2. Cut brussels sprouts in half.
3. Bring a medium pot of water to a boil, and add salt. Meanwhile, prepare an ice-water bath.
4. Add brussels sprouts to boiling water, and cook until tender but still bright green, about 4 minutes.
5. Remove from heat, drain, and plunge into ice-water bath to cool.
6. Drain well.
7. Heat 1 tablespoon butter and 1 tablespoon olive oil in a large heavy skillet over medium-high heat.
8. Add the onions and cook, stirring occasionally, until wilted and transparent, about 3 to 4 minutes.
9. Add vinegar, and stir to loosen any brown bits on bottom of pan. Cook until vinegar is reduced and the onions are glazed.
10. Add remaining 1 tablespoon butter and oil to the same pan, and move the onions to the side of the pan.
11. Add brussels sprouts, and cook, tossing occasionally, until they are brown and crisp on the edges, about 3 minutes (this can take longer).
12. Mix together the onions and the brussels sprouts in the pan until perfect!
Enjoy!
Thanksgiving: Turkey!
I hope you had a wonderful Thanksgiving. As you know, I love this holiday. I love this holiday so much that I celebrated it three times this year. Once at my sister's friend's potluck, then again at a pot luck with my graduate school program, and then a third time with my wonderful family in New Jersey. I was really excited because I prepared the turkey for my graduate school potluck, an experience I had yet to do on my own. I found a fabulous local, happy Maryland turkey and picked up all 18 pounds of him on Sunday morning.
I spent a lot of time debated how I would prepare this turkey, looking through food magazines, cookbooks, and websites. In the end, I asked my mom to send me the recipe she uses and I don't think I will ever stray from it. We also used this recipe to prepare our family's Thanksgiving meal. It is perfect.
Notes about turkey timing: Directly upon removal from the refrigerator, place the bird in a preheated 450 degree oven. Reduce the heat immediately to 350 or to 325 for large turkeys. After the first half hour of cooking baste frequently with pan drippings. Cook to an internal temperature of 180 or 185. The center of the stuffing should reach at least 165. If not using a thermometer, allow 20 to 25 minutes per pound for birds up to 6 lbs. For larger birds, allow 15 to 20 minutes per lb. For turkeys over 16 lbs, allow 13 to 15 minutes per pound. Add about 5 minutes to the pound if the bird you are cooking is stuffed (we stuff our birds). For our 18 pound bird, we cooked it 5 hours.
Thanksgiving Turkey (with gravy and stuffing) (from my mom adapted from The Joy of Cooking and the Silver Palate)
What You Need
Stuffing
-2 T of vegetable oil
-3 cups of chopped celery with leaves
-2 cups chopped onions
- 2 tart apples cut into 1/2 inch cubes (pealed)
- 1 cup walnuts, chopped
- 1 cup of raisins
- 6 cups stall bread cubes (we use Pepperidge Farm seasoned cubes that come in bag)
- 1 t salt
- 1 t of dried thyme leaves
- 1 t of crumbled dried sage leaves
- group black pepper to taste
- 1 cup tawny port
- 1 cup of chicken stock
Turkey (and gravy)
- A turkey (between 18 - 20 lbs. for this recipe)
- 3 ribs of celery, halved crosswise
- 1 onion quartered
- 1 large carrot, pealed and quartered
- 3 1/2 cups of water
- 8 T of unsalted butter, melted
- 3/4 cup tawny port
- 1/4 cup unbleached all purpose flour
- salt and pepper to taste
What You Do
1. First begin by preparing the stuffing.
2. Heat the oil in a large skillet and saute the celery and onions over low heat until softened but not browned, 10 minutes.
3. Transfer the vegetables to a large mixing bowl.
4. Stir the apples, walnuts, and raisins into the mixture.
5. Add the bread cubes and toss lightly.
6. Sprinkle with salt, thyme, sage and pepper. Toss lightly again.
7. Add the port and sock, toss again until well blended.
8. Preheat oven to 450.
9. Rinse the turkey well and pat it dry. Rinse the inside of the turkey with the juice of an orange.
10. Stuff the cavity loosely with about 7 cups of stuffing. Skewer or sew the opening shut.
11. Stuff the neck area with about 3 cups of stuffing. Secure the neck skin flap under the turkey.(Put any remain stuffing in an ovenproof casserole and set it aside.)
12. Arrange a bed of the celery, onion and carrot pieces in a large roasting pan.
13. Gently place the turkey on the vegetables.
14. Pour 3 cups water into the pan.
15. Cover the breast with cheese clothe soaked in melted butter. (You will remove the cheese clothe at the last hour or most likely 1/2 hour of cooking.)
16. Roast the turkey for 4 hours brushing it well with melted butter once an hour.
17. After it has cooked for 4 hours, pour or brush 1/4 cup of the port over the turkey. Bake 15 minutes.
18. Repeat basting with port and baking three more times, until the turkey has cooked a total of 5 hours. (Note: If you have reserved some extra stuffing in a casserole, stir in a bit of the pan juices and put it in the oven during the last hour, loosely covered. Bake for 45 minutes.)
19. Transfer turkey to a platter, cover it loosely with foil and allow it to rest for 15 minutes.
20. While the turkey is resting, strain the pan juices into a saucepan and heat to a simmer.
21. Stir the flour and remaining 1/2 cup of water together in a small brown until smooth.
22. Whisk this into the pan juices and heat to a boil. Simmer 5 minutes.
23. Season with salt and pepper.

This is the most fun and leaves your house smelling delicious. After carving the turkey, you can use the bones to make a wonderful turkey stock by simmering the bones with some onions and carrots in water for 3-5 hours.
Saturday, November 20, 2010
Pre-Thanksgiving Weekend
I'm so excited. I'm picking up my turkey for my Friendsgiving tomorrow morning and I have my plan for cooking (thanks to my mom!). I can't wait.
Off to shop and cook for another Thanksgiving potluck tonight.
Also, my mom and I agreed on our menu for our Thanksgiving meal (more recipes to be posted after we see how they go next week).
- Appetizers from our family friends
- Onion and Fennel Soup (from Gourmet Today Cookbook)
- Kale and Apple Salad
- Turkey, stuffing, gravy (my mom's specialities- to be posted after this weekend) and cranberry sauce
- Brussels Sprouts (choosing between two new recipes)
- Sweet potato casserole
- Green bean casserole (not sure about this one yet)
- Pumpkin Pie (from French Women Don't Get Fat)
Okay, time to run out to the store to get started with the fun.
Friday, November 5, 2010
Broccoli Salad
Yay! Friday. Today, I made a yummy vegetarian broccoli salad. The recipe is nice and you hardly miss the bacon!
Broccoli Salad (Adapted from allrecipes.com)
What You Need
- 1 head fresh broccoli, cut into bite size pieces
- 1/2 cup raisins
- 1 small red onion, chopped
- 2 tablespoons white sugar
- 2 tablespoons balsamic vinegar
- 3/4 cup mayonnaise
- 1 cup sunflower seeds (I used less because I didn't have enough)
- 1/2 cup walnuts
What You Do
1. In a salad bowl, toss together broccoli, raisins, walnuts and red onions.
2. In a separate bowl, whisk together the white sugar, vinegar and mayonnaise.
3. Pour over broccoli mixture and toss to coat.
4. Add on the sunflower seeds.
4. Refrigerate for at least 2 hours before serving.
Tuesday, November 2, 2010
Election Night Caesar Salad
As you can tell, I'm obsessed with Smitten Kitchen these days. Along with her description of cauliflower soup, she had a recipe for Deb's Caesar Salad Dressing. So, I decided to try it! Caesar Salad is a great comfort food for me!
Caesar Salad (dressing adapted from Smitten Kitchen)
What You Need
- 2 tablespoons mayonnaise
- 1 1/2 tablespoon fresh lemon juice
- 1/2 teaspoon Dijon mustard
- 1 small garlic clove, minced
- 1/2 teaspoon Worcestershire sauce
- 1/4 cup extra-virgin olive oil
- 1/2 teaspoon capers
- 1/4 teaspoon horseradish
- 1 head romaine lettuce, chopped
- Garlic croutons
- 1-2 tablespoons parmesan cheese
(Note: her recipe calls for 1 oil packed anchovy fillet, finely chopped. I didn't have any and probably would avoid this anyway, so my roommate and I added the capers and horseradish to compensate)
What You Do
1. First make the dressing by whisking all ingredients (except olive oil) together.
2. Gradually whisk in 1/4 cup olive oil.
3. Season with salt and pepper. (Note that the dressing can be made 1 day ahead. Cover and refrigerate. Bring to room temperature and re-whisk before using.)
4. Prep croutons.
5. Toss lettuce, dressing, croutons, and cheese together.
Enjoy!
Cauliflower Soup
I love cauliflower. This week at the farmer's market. I purchased the biggest cauliflower I have ever seen. I made my roommate take a picture, which I will post for you soon.
With this cauliflower, I used 1/3 of it to make the following wonderful soup for this cold, election day.
Cauliflower Soup (adapted from Food Network, also found on Smitten Kitchen)
What You Need
- 1 head cauliflower (or in my case, 1/3 of a massive cauliflower)
- 2 tablespoons extra-virgin olive oil
- 1 small onion, chopped
- 2 cloves garlic, minced (I used 4)
- 1 quart vegetable stock
- 1/2 cup finely grated Parmesan (I used a bit less)
- Salt and freshly ground black pepper
What You Do
1. Remove the leaves and thick core from the cauliflower, coarsely chop, and reserve.
2. Heat the olive oil in a large saucepan or soup pot over medium heat and add the onion and garlic.
3. Cook until softened, but not browned, about 5 minutes.
4. Add the cauliflower and stock and bring to a boil.
5. Reduce the heat to a simmer, cover, and cook until the cauliflower is very soft and falling apart, about 15 minutes.
6. Remove from heat and, here the recipe calls for blending (either with a hand held immersion blender or in small batches in a blender). However, I just used my potato smasher and mashed up the cauliflower. I like to have a little bit of varied texture to the soup and avoid having to clean the blender (I don't have a hand held blender). You can do it either way.
7. Add the Parmesan and stir.
8. Season, to taste, with salt and black pepper.
Enjoy on a cold day! It warms your insides even while you are nervous about the election results.
Monday, November 1, 2010
Spinach and Artichoke Dip
For my roommate's birthday yesterday, we had a wonderful potluck/cookout. I was excited to make spinach and artichoke dip. I found the best recipe in my 2010 Food and Wine Cookbook. I'm thinking of making this as an appetizer for Thanksgiving. It is very easy to make but more sophisticated and yummy than other spinach dips I've tried making. Enjoy!
Spinach and Artichoke Dip (from Food and Wine)
What You Need
- 1 tablespoon extra-virgin olive oil
- 1 small onion, finely chopped
- 3 garlic cloves, very finely chopped
- 16 ounces marinated artichokes, drained and coarsely chopped (I used a bit less, just one 14 ounce can, but next time I'd try for a little bit more)
- 1/4 cup dry white wine
- Two 10-ounce packages frozen chopped spinach, thawed and squeezed dry
- 12 ounces cream cheese, at room temperature
- 1/2 cup freshly grated Parmigiano-Reggiano cheese
- 1 teaspoon finely grated lemon zest
- Tabasco
What You Do
1. In a large skillet, heat the olive oil until shimmering.
2. Add the chopped onion and garlic and cook over moderate heat, stirring, until softened, about 5 minutes.
3. Add the artichokes and cook, stirring occasionally, until lightly browned in spots, about 5 minutes.
4. Add the white wine and cook until nearly evaporated.
5. Add the spinach and cook, stirring, for 1 minute.
6. Add the cream cheese, Parmigiano-Reggiano and lemon zest and season with Tabasco.
7. Cook, stirring, until the dip is creamy, about 2 minutes.
8. Transfer to a bowl and serve warm (the recipe says you can serve it at room temp but it is much better warm!)
I served the dip with crackers, chips, and bread. The recipe calls for spiced pita chips that would be delicious as well. The dip is great, so it doesn't matter what you serve it with really.
I hope you are all starting to think about your Thanksgiving menu and turkeys. I am going to be going to a pre-Thanksgiving party the Sunday before Thanksgiving and have been challenged to find a local MD turkey farm that will allow me to pick up our turkey on the Sat. before Thanksgiving. At the Farmer's Market in Greenbelt, I found it: Ferguson Family Farm. I'm looking forward to working out the logistics for an early pick up of our truly farm fresh turkey.
I love this season!
Sunday, October 31, 2010
Cauliflower Cake
I found this recipe from Smitten Kitchen as soon as I came home from the farmer's market last week. I knew I wanted to prepare it for my mom and sister who were staying with me on the eve of the Rally to Restore Sanity this weekend.
It was delicious but very filling. We have plenty of leftovers so go along with our halloween candy and birthday cupcakes (today was also my roommate's birthday) to eat all week long!
Cauliflower Cake (from Smitten Kitchen)
It was delicious but very filling. We have plenty of leftovers so go along with our halloween candy and birthday cupcakes (today was also my roommate's birthday) to eat all week long!
Cauliflower Cake (from Smitten Kitchen)

What You Need
- 1 medium cauliflower
- 1 large red onion, peeled
- 5 tablespoons olive oil
- 1/2 teaspoon finely chopped rosemary
- 10 medium or 8 large eggs
- Handful basil, chopped
- 1 1/2 cups all-purpose flour
- 2 1/2 teaspoons baking powder
- 1/2 teaspoon ground turmeric
- 2 cups finely grated parmesan cheese
- Salt and black pepper
- Butter, for greasing pan
- 2 tablespoons sesame seeds (recipe calls for black, but I used white and a bit more than 2 tablespoons)
What You Do
1. Preheat oven to 350°F degrees.
2. Break cauliflower into medium florets.
3. Place floret in a pot with a teaspoon of salt, cover them with water and simmer for 15 to 20 minutes, until quite soft.
4. Strain and let drip in the colander for a few minutes so they dry and cool.
5. Halve your red onion and cut a few thin rings off the end of one side; set them aside.
6. Coarsely chop the remainder of your onion.
7. Heat all of your olive oil in a saucepan and saute the chopped red onion and rosemary together until soft, about 8 minutes. (This smells so good!)
8. Remove from heat and allow to cool.
9. Whisk eggs and olive oil and onion mixture together. Stir in basil.
10. Whisk flour, baking powder, turmeric, cheese, 1 1/2 teaspoons salt and many grinds of black pepper together in a separate bowl.
11. Add to egg mixture, whisking to remove lumps. Stir in cauliflower gently, so most pieces remain intact.
12. Line the bottom of a 9-inch round pan with parchment paper.
13. Butter the sides generously.
14. Put the sesame seeds in the pan and toss them around so that they stick to the sides.
15. Pour in the cauliflower batter, arrange the reserved onion rings on top and bake cake in the center of the oven for 45 minutes, until golden brown and set.
Serve warm or at room temperature. Yum. More on cauliflower to come!
Sunday, October 24, 2010
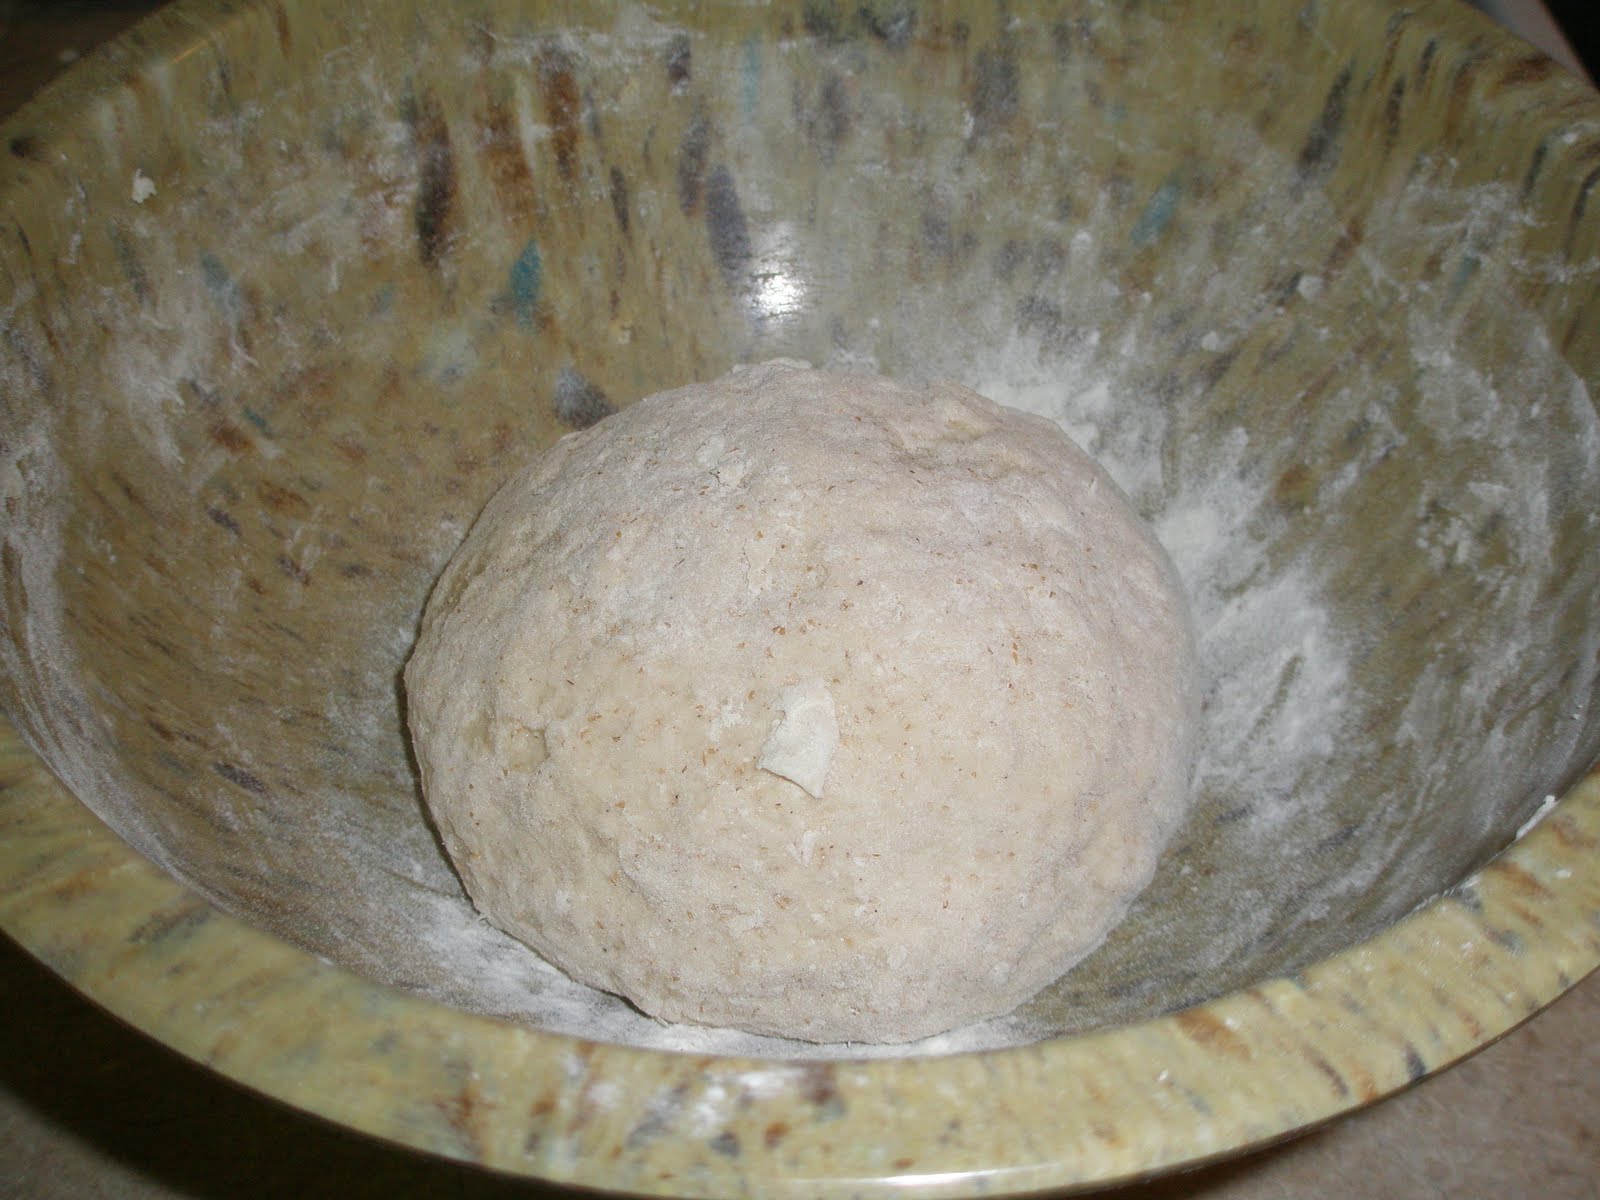
Learning to make bread, effortlessly!
Something I love about my roommate: she bakes! She makes wonderful and delicious goodies with what seems like very little effort. Whipping up cookies and muffins in time for breakfast or dessert. And, best of all, BREAD! Bread so that we have it all week long, and when the loaf is running low-- POOF there is more of it. I insisted as part of my procrastination routine from midterm studying, that she instruct me how to make this wonderful creation. Then, next time the bread is running low, I will be responsible for replenishing our stash.
The recipe is very simple, but makes a very tastey crunchy, crusty loaf of bread. She has it on an index card with her other family favorite recipes and has permitted me to post it to the blog. She also let me in on her family's secret to this bread: they found it in the New York Times when Bittman posted it. You can also see more raving about this recipe on Smitten Kitchen. Yum Yum Yum!
Crunchy, Crusty Loaf (adapted from Jim Lahey, Sullivan Street Bakery by Bittman in the NY Times and Smitten Kitchen, see links above, but most importantly, from my roommate and her family)
What You Need
- 1.5 cups warm water
- 1/4 teaspoon yeast
- 1 1/4 teaspoon salt
- 3 cups flour (here is the combo we've been using: 1/2 cups mixed grains, 1 cup whole wheat flour, and 2 cups white flour)
What You Do
1. Mix together the water, yeast, and salt.
2. Add in the flour.
3. Cover with a towel and store in a warm place (room temp) for over 12 hours. We put it on top of our fridge.
4. Pre-heat oven to 450 degrees.
5. Add dough to a dutch oven (this recipe should be used with a small dutch oven but if you have a large one, double the recipe)
6. Bake for 30 minutes.
Enjoy! And make sure to prep some more dough before you run out.
Another Soup: Squash Soup

So, I am supposed to be studying for midterms, but instead I'll post another recipe I made this weekend (actually, I made this when I needed a break from learning about heavy metals today!). I used hubbard squash, but any squash will do! Of course there are easier squash soup recipes out there, but this one had a wonderful flavor and wasn't too difficult (especially since I opted not to whip out the food processor).
Squash Soup (adapted from Emeril's Acorn Squash Soup on planetgreen.com)
Squash Soup (adapted from Emeril's Acorn Squash Soup on planetgreen.com)
What You Need
- 2-3 squash, halved, seed removed (recipe calls for acorn, I used hubbard)
- 3 tablespoons olive oil
- 2 carrots, chopped
- 1 apple, peeled cored and chopped (recipe calls for Granny Smith, but I didn't use one)
- 1 yellow onion, chopped
- 1/4 teaspoon fresh ginger (I used a bit more than this, up to 1/2 teaspoon... be sure to taste test though)
- Pinch of cinnamon (recipe called for 1/8 teaspoon allspice, but I didn't have any)
- 4 cups vegetable broth
What You Do
1. Preheat oven 400 degrees F.
2. On a baking sheet, roast the acorn squash, cut side down, until soft, about 45 minutes.
1. Preheat oven 400 degrees F.
2. On a baking sheet, roast the acorn squash, cut side down, until soft, about 45 minutes.
3. Scoop out the squash flesh and set aside.
4. In a soup pot, heat olive oil over medium high heat.
5. Saute carrot, apple, and onion until soft.
6. Season with ginger and cinnamon (or allspice).
7. Add the squash and the stock.
8. Simmer for 20 minutes.
9. Remove the pot from the heat. Here the recipe says to "puree with a hand-held immersion blender" or put it in a blender or food processor and return to the pot. However, I just used a potato masher and got a great consistency-- still with small pieces of carrot and onion. Depends on your preference and desire to wash dishes (I don't have a dish washer so I avoid the food processor).
10. Season with salt and pepper.
Kale Soup
A spin of my vegetable soup I posted a couple weeks ago, I have also been making a kale soup which is very good and really easy to make (I even made it one morning before work). I promise I'll take a break from kale recipes after this one, but my roommate just returned from her family's farm with lots and lots of greens.
Kale Soup
What You Need
- 2 tablespoons olive oil
- 1 yellow onion, chopped
- 3-4 cloves garlic, minced
- 2-3 stalks celery
- 1 bunch kale, stems removed and leaves torn into pieces
- 3-4 potatoes (depending on size), peeled and chopped
- 6 cups vegetable stock
- salt and pepper to taste
What You Do
1. Heat olive oil in a pot and add onion, garlic, and celery.
2. Saute onion, garlic and celery on medium heat until soft (about 5 minutes).
3. Add kale and stir until kale begins to wilt (about 2 minutes).
4. Add potatoes and vegetable stock.
5. Simmer soup on medium heat for 30 minutes (or until the potatoes are soft).
6. Add salt and pepper to taste!
You can add extra seasoning and extra veggies to this easy soup. It tastes great on a cold day. You can also add in some extra firm tofu cut into bite sized pieces!
Kale Salad (The Start of Thanksgiving Menu Planning)
As many of you know, I love Thanksgiving Dinner and I especially love the month prior to Thanksgiving when I spend time menu planning and debating about turkeys. Well, the turkey question has been solved for this year. We are sticking with Goffle Road Poultry Farm located in Wyckoff, NJ (very close to my mother's house).
With the arrival of the November Food and Wine Magazine, I have started plotting and planning recipes to try out in anticipation of Thanksgiving. Here is a great one tried last week: Kale and Apple salad. While I loved my fall salad I've used the last couple years, this is a great twist, with tasty kale! I'm thinking this will have a place at this year's Thanksgiving table.
Kale and Apple Salad (adapted from Food and Wine)
What You Need
- 2 cups pecans
- 1/2 cup confectioners' sugar
- 1/2 teaspoon cayenne pepper
- Kosher salt
- 1/4 cup extra-virgin olive oil
- 1/4 cup white wine vinegar
- 2 tablespoons caper brine (from a jar of capers)
- 3 tablespoons pure maple syrup
- Freshly ground black pepper
- 2 apples, cut into matchsticks (the recipe calls for Granny Smith)
- 1 large head radicchio, shredded (we didn't use this, but I will next time!)
- One 8-ounce bunch kale—stems discarded, leaves finely shredded
- 3 tablespoons snipped chives (we didn't use this, but I will next time)
- 1 tablespoon chopped tarragon (we didn't use this, but I will next time)
- 2 ounces shaved pecorino (we didn't use this, but I will next time)
What You Do
So, here is how the recipe asks you to prepare the pecans:
1. Preheat the oven to 350°.
2. In a bowl, cover the pecans with water.
3. Transfer to a sieve and shake out the water.
3. In another bowl, whisk the confectioners' sugar, cayenne and 1 1/2 teaspoons of salt.
4. Add the pecans and toss.
5. Transfer to a sieve and shake off the excess coating.
6. Arrange the pecans on a parchment paper–lined baking sheet and bake for 10 to 12 minutes, until the sugar is lightly caramelized and the pecans are golden.
Here is how I did it. I'm going to try their way next time and see which one is best for Thanksgiving:
1. Heat 2 tablespoons butter in a pan.
2. Add 3-4 tablespoons brown sugar and melt.
3. Add and toss pecans for 1 minutes.
4. Arrange coated pecans on parchment paper until cool.
Then, make the dressing:
1. Whisk in the olive oil, vinegar, caper brine and maple syrup and season the dressing with salt and black pepper.
And finally, assemble the salad:
1. Add the apples, radicchio, kale, chives, tarragon and pecorino and toss. Mound the salad on plates, garnish with the pecans and serve.
Sunday, October 10, 2010
Vegetable Soup
I made this vegetable soup last week and loved it. The recipe made enough so that I had leftovers all week long and was able to eat it for lunch throughout the week. It was excellent.
Vegetable Soup (adapted from Alton Brown)
What You Need
-4 tablespoons olive oil
-2 cups chopped onions (recipe called for leeks, but I didn't have any-- only white parts)
- 2 tablespoons finely minced garlic
- Kosher salt
- 2 cups carrots, peeled and chopped into rounds (approximately 2 medium)
- 2 cups peeled and diced potatoes
- 2 cups fresh green beans, broken or cut into 3/4-inch pieces
- 2 quarts vegetable broth
- 4 cups peeled, seeded, and chopped tomatoes
- 1/2 teaspoon freshly ground black pepper
- 1/4 cup packed, chopped fresh parsley leaves
- 1 to 2 teaspoons freshly squeezed lemon juice
What You Do
1. Heat the olive oil in large, heavy-bottomed stockpot over medium-low heat.
2.Once hot, add the onions, garlic, and a pinch of salt and sweat until they begin to soften, approximately 7 to 8 minutes.
3. Add the carrots, potatoes, and green beans and continue to cook for 4 to 5 more minutes, stirring occasionally.
4. Add the stock, increase the heat to high, and bring to a simmer.
5. Once simmering, add the tomatoes and pepper.
6. Reduce the heat to low, cover, and cook until the vegetables are fork tender, approximately 25 to 30 minutes.
7. Remove from heat and add the parsley and lemon juice.
8. Season, to taste, with kosher salt.
Serve immediately. Yum! Perfect as the weather starts to get cooler.
10/10/10
Today was 10/10/10 and together with friends from the community we went to work with Groundwork Anacostia River DC to set up a community garden in N.E. DC. Although the original site for the community garden was not ready for us to do work, we were able to go over to the new location for the Center for Green Urbanism and help them put in raised beds, clear trash, and weed the garden.
It was a great day working towards common goals of sustainability, urban gardening, and community activism.
Here are some photos:


Take a look at 350.org to learn about the events that went on today around the world to raise awareness and fight against climate change!
It was a great day working towards common goals of sustainability, urban gardening, and community activism.
Here are some photos:


Take a look at 350.org to learn about the events that went on today around the world to raise awareness and fight against climate change!
Thursday, September 30, 2010

Saturday, September 25, 2010
Fall Gardening in 90 Degrees
The new fall greens are growing really nicely. The okra plant is still giving me some okra and the green beans and growing and producing as well. The only loss so far has been that the squirrels have demolished the lettuce. So, we put in extra wood around the broken fence to keep the creatures from coming in through the holes. And, we planted some more lettuce and more greens. We also spent time thinning out the radishes and greens.

Disregrard the trash heaps on either side, my landlord is finally getting rid of the shed that was destroyed during the summer storms.
Here is the happy little plot:

Disregrard the trash heaps on either side, my landlord is finally getting rid of the shed that was destroyed during the summer storms.
Thursday, September 23, 2010
Read this Book: Eaarth by Bill McKibben
Barbara Kingsolver, who I love and adore and love some more says: "Read it, please. Straight through to the end. Whatever else you were planning to do next, nothing could be more important."
I couldn't agree with her more. Eaarth by Bill McKibben is such an important book to read. It will reshape the way you think about climate change and really challenge you to think about what to do now, since we have already irreversibly changed the climate on our planet. McKibben says, "Imagine we live on a planet. Not our cozy, taken-for-granted earth, but a planet, a real one, with darkpoles and belching volcanoes and a heaving, corrosive sea, raked by winds, strafed by storms, scorched by heat. An inhospitable place. It’s a different place. A different planet. It needs a new name."
You have to read the first half of the book quickly. It is a depressing picture of our world and the harsh realities of climate change and our culture of growth and bigness. McKibben says, "We have, in short, goosed our economy with one jolt of Viagra after another, anything to avoid facing the fact that our reproductive days were past and hence constant and unrelenting thrust was no longer so necessary. (I suspect global warming is the planetary equivalent of the dread 'erection lasting more than four hours' that we're warned about on the TV commercials.)" (I thought the metaphor was pretty funny, anyway).
Much of his solution to living on this new planet, Eaarth, has to do with investment and revitalization of local economies. The first local economy he discusses in the book is the food economy. He says, "So it's unsettling (but also the first unambiguously good news this book has to offer) to learn that serious people have begun to rethink small-scale agriculture, perhaps just in time to help us deal with the strains of our new planet." I enjoyed his presentation of the many facets of local economies and how to meet human needs on Eaarth (not just in the US but around the world, even in the developing world).
Another part of the solution is working to get our atmosphere back on track by lowering the amount of CO2 to 350 parts per million. Scientists say that 350 parts per million CO2 in the atmosphere is the safe limit for humanity. Currently, we are over 388 parts per million. You can check out his organization on their website 350.org. There are organizing a global action day on 10/10/10. Check it out here.
Read the book, check out the website, and really start thinking about ways you can help solve the complex issues we are confronted with by McKibben.
Friday, September 17, 2010
Erdbeerbowle: German Strawberry Punch
I almost forgot, one of the other favorites from Labor Day was my friend's strawberry punch called Erdbeerbowle (from Germany). Here is what she says on how to make it and according to her, it is simple!
Erdbeerbowle: German Strawberry Punch (per Miriam)
What You Need
- About 2 boxes of strawberries
- Sugar
- Brandy (optional)
- 1 bottle white wine
- 1 bottle of champagne
What You Do
1. Slice or halve the strawberries and place them in a container that is large enough so the berries are just one layer.
2. Sprinkle a thin layer of sugar over the berries. Less sugar if the berries are really sweet (my mom hardly uses any sugar at all!) and up to like a 1/4 cup if they are not so sweet. It's up to taste-- but don't fret about this! (NOTE: You can also add a shot or so of brandy at this step, if you like, recommendation would be cointreau.)
3. Put strawberries in the refrigerator for at least 2 hours
4. Add a bottle of white wine
5. Refrigerate for at least 2 more hours
6. Right before you serve, add a bottle of champagne
7. Some people garnish with mint leaves or lemon peels
With strawberries+sugar+wine+champagne, you really can't go wrong. If it comes out too sweet just add more champagne. My friend says that her grandparents make it with 1 bottle wine, 1 bottle champagne, and 1 bottle seltzer water for a more refreshing summer punch.
Last note, you can make this the night before you need it. Doesn't matter if the strawberries sit in the sugar all night, and they can also soak in the white wine for well over 2 hours, if need be. Just make sure to add the champagne immediately before serving.
Thanks Miriam! :)
Rosh Hashanah Meals, Including a Vegetarian Casserole!
For Day One of Rosh Hashanah, we kept the meal light and vegetarian. We made some salads, a kugel, and an eggplant and zucchini casserole. My mom and I both made the casserole again the following week, it was so good and easy to make.
Layered Eggplant, Zucchini and Tomato Casserole (from Food and Wine)

What You Need
- 3 tablespoons extra-virgin olive oil, plus more for greasing and brushing
- 3 medium zucchini (1 1/2 pounds), sliced lengthwise 1/4 inch thick
- 2 long, narrow eggplants (1 1/2 pounds)(the recipe says to peel them, but I didn't, I also used a variety of eggplant not just narrow ones) sliced lengthwise 1/3 inch thick
- Salt and freshly ground pepper
- 1 large shallot, minced
- 1 pound plum tomatoes, cut into 1/2-inch dice
- 3 ounces feta cheese, crumbled (3/4 cup) (I used more!)
- 1/4 cup chopped basil (I used more)
- 1/3 cup panko or coarse dry bread crumbs
What You Do
1. Preheat the oven to 425°.
2. Oil 2 large rimmed baking sheets.
3. Put the zucchini slices on one sheet and the eggplant on the other. Brush the slices all over with oil and season with salt and pepper.
4. Arrange the slices on each sheet in a slightly overlapping layer. Bake for 15 minutes, until tender.
5. Meanwhile, in a large skillet, heat 2 tablespoons of the oil.
6. Add the shallot and cook over moderate heat until softened, 3 minutes.
7. Add the tomatoes and cook over high heat until slightly softened and bubbling, 1 minute. Season with salt and pepper.
8. Oil a large, shallow baking dish (about 10 by 15 inches).
9. Lay half of the eggplant in the dish and spread one-fourth of the tomatoes on top.
10. Scatter with half of the feta and basil.
11. Layer half of the zucchini on top, followed by another one-fourth of the tomato and the remaining basil, eggplant and zucchini.
12. Top with the remaining tomato and feta.
13. Mix the panko with the remaining 1 tablespoon of oil and sprinkle over the casserole.
14. Bake in the upper third of the oven for 20 minutes, until bubbling and crisp.
15. Let stand for 5 minutes, then serve hot or warm.
For the second day of Rosh Hashanah we had a more traditional meal with roasted potatoes, brisket (sweet and sour, refer to old post), honey glazed carrots, and grilled veggies.
 It was a delicious holiday!
Grilled Tomatoes
I found some wonderful heirloom tomatoes at the farmer's market before Labor Day.
Charred Heirloom Tomatoes with Fresh Herbs (from Bon Appetit- do you see a pattern for my recipes from Labor Day?)
What You Need
- 4 large firm heirloom tomatoes (about 10 ounces each), cored, cut horizontally in half
- 2 tablespoons fresh oregano leaves, divided
- 2 tablespoons fresh thyme leaves, divided
- 5 tablespoons (about) extra-virgin olive oil, divided
What You Do
1. Arrange tomatoes, cut side up, on rimmed baking sheet.
2. Sprinkle with salt and pepper, then 1 1/2 tablespoons each oregano and thyme leaves.
3. Drizzle with 3 tablespoons oil.
4. Let stand at room temperature.
5. Prepare barbecue (medium-high heat).
6. Place tomatoes, cut side up, on rack (they said to brush the rack with oil, but I didn't).
7. Cook until bottoms are charred, 3 to 4 minutes. (Be careful with these guys on the grill!)
8. Turn tomatoes over and grill just to sear, about 1 minute.
9. Turn cut side up onto platter.
10. Sprinkle with 1/2 tablespoon each oregano and thyme, then drizzle with more oil, if desired.
Serve warm.
Cucumber Salad
This was the biggest surprise from the cook out. I saw it online when looking for menu ideas for the day. Since I am so obsessed with pickles, I couldn't resist. But, I didn't know how others would react to the dish. Everyone loved it (it was one of my mom's favorite dishes of the week). We are even making it again for Yom Kippur Breakfast.
Sweet-and-Sour Cucumbers with Fresh Dill (from Bon Appetit)
What You Need
-2 English hothouse cucumbers (1 1/2 pounds total), unpeeled, very thinly sliced
-1 tablespoon coarse kosher salt
-1/2 cup distilled white vinegar
-1/4 cup finely chopped fresh dill
-3 tablespoons sugar
-1/2 teaspoon freshly ground black pepper
What You Do
1. Place cucumber slices in colander.
2. Sprinkle with salt; toss to coat.
3. Let stand 15 minutes, stirring occasionally.
4. Meanwhile, for dressing, stir vinegar, dill, sugar, and pepper in large bowl until sugar is dissolved.
5. Drain cucumbers well; pat dry.
6. Add cucumbers to dressing and stir to blend.
7. Refrigerate at least 15 minutes and up to 2 hours; serve cold.
YUM!
Labor Day Potato Salad
This potato salad was delicious. Try it out for a fall cookout!
Potato and Pea Salad with Chive Aioli (from Bon Appetit)
What You Need:
-3 pounds small red-skinned new potatoes, unpeeled
-3 tablespoons white wine vinegar
-3 celery stalks, thinly sliced
-1 1/2 cups frozen green peas, thawed
-1 cup mayonnaise
-6 tablespoons chopped fresh chives (from the garden!)
-1 tablespoon Dijon mustard
-2 garlic cloves, pressed
-1/4 teaspoon cayenne pepper (this gives it a little kick!)
What You Do:
1. Cook potatoes in large pot of boiling salted water until just tender, about 25 minutes.
2. Drain; cool.
3. Cut potatoes into quarters.
4. Transfer to large bowl; add vinegar and toss to coat. Mix in celery and peas.
5. Whisk mayonnaise, 5 tablespoons chives, mustard, garlic, and cayenne pepper in small bowl to blend.
6. Add to potato mixture and toss.
7. Season generously with salt and pepper.
8. Cover and chill at least 1 hour to allow flavors to blend.
NOTE: Can be made 1 day ahead. Keep refrigerated. Sprinkle with remaining 1 tablespoon chives and serve.
Labor Day
My mother came into town for a week to celebrate two holidays: Labor Day and Rosh Hashanah. First came Labor Day where we had a Labor Day cookout on Sunday followed by a day-long hike at Sugarloaf.

The hike was wonderful and the cookout was a major hit.
The menu:
- Grilled Veggies (marinated in red wine vinegrette)
- Grilled Heirloom Tomato
- Potato Salad
- Cabbage Salad/Slaw
- Sweet and Sour Cucumbers
- Peach Cobbler (and vanilla ice cream, of course)
There were plenty of drinks and some additions to the food brought by guests! The food was great. The next couple posts will include recipes from the highlights.
Frenzy of Blogging!
I’ve been holding back some blog posts because I’ve been so busy with the Jewish holidays and starting graduate school. I have some down time this evening, so here we go!
Friday, September 3, 2010
Harvest?
So, you saw the cukes I got from the garden. I've also harvested two okra pods. I see two big tomatoes turning red as well as plenty of baby tomatoes. Additionally, looks like we will have nearly 7 peppers. Wooohooo! Here of some pictures of the produce:


 I planted the brussles sprouts and cauliflower yesterday. We also started some lettuce inside the house. On Sat., we will get out and plant much of the greens and other veggies for the fall garden.


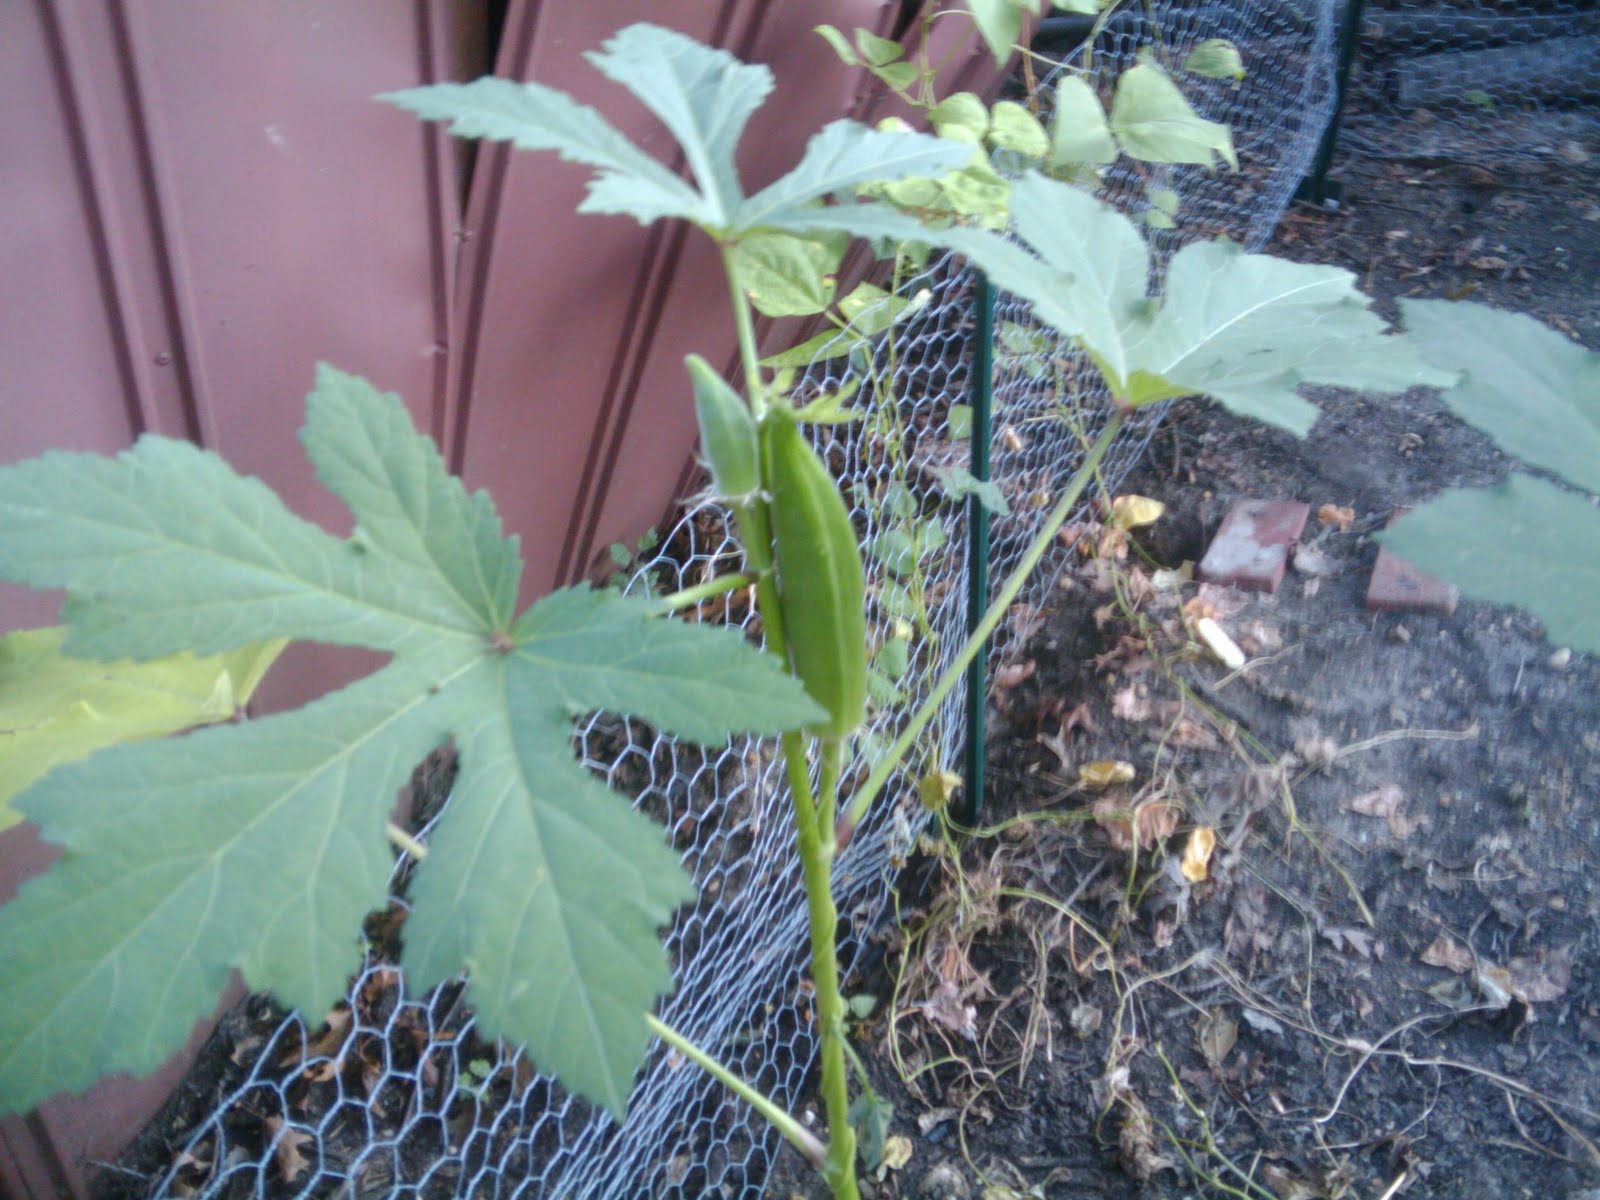
 I planted the brussles sprouts and cauliflower yesterday. We also started some lettuce inside the house. On Sat., we will get out and plant much of the greens and other veggies for the fall garden.
 Tuesday, August 31, 2010
Back into the Garden
As you might have guessed, the mess in my backyard has really gotten me down and driven me out of my garden. Top that off with the hot weather that kept all my plants from producing fruits, and I was very discouraged. But, thankfully, my new roommie talked it over with her dad (a farmer) and took another look before I gave up the whole thing. And, although my squash and cukes got a fungus of some sort, some of my plants have finally started producing. I've got some green tomatoes (baby and big varieties), cukes, okra, and sweet peppers.
Here are the cukes I picked today:
 With this new information and renewed enthusiasm, I started cleaning up the yard. I decided to no longer wait for my landlord to get the debris from the fallen trees out of the way. So, I cleared off the top half of the backyard and then went through and pulled out all the dying plants in the garden (lettuce, squash, peas). I also cleaned up the cukes so they take over less area and tidied up around everything else:

 I have plenty of new seeds for fall and also some seedlings (Brussels sprouts and cauliflower below). This weekend I intend on finishing up much of the backyard cleanup and planting all the new seeds and seedlings. We will be focusing on greens but also have a whole lot of good stuff (kale, spinach, mesclun, radishes, kohlrabi, speghetti sqaush, lettuce, arugula, collards, and some flowers).
 I'm thinking the fall crop is going to be a much bigger success than the summer. We'll see if mother nature plays along.
Here are the cukes I picked today:
 With this new information and renewed enthusiasm, I started cleaning up the yard. I decided to no longer wait for my landlord to get the debris from the fallen trees out of the way. So, I cleared off the top half of the backyard and then went through and pulled out all the dying plants in the garden (lettuce, squash, peas). I also cleaned up the cukes so they take over less area and tidied up around everything else:
 I have plenty of new seeds for fall and also some seedlings (Brussels sprouts and cauliflower below). This weekend I intend on finishing up much of the backyard cleanup and planting all the new seeds and seedlings. We will be focusing on greens but also have a whole lot of good stuff (kale, spinach, mesclun, radishes, kohlrabi, speghetti sqaush, lettuce, arugula, collards, and some flowers).
  I'm thinking the fall crop is going to be a much bigger success than the summer. We'll see if mother nature plays along.
 Canning Experiment
For over three years, I have dreamt about canning. I fantasized about having so many fruits or veggies in the summer that you just threw them in a pot and began canning. Then, when winter came around, you'd pull one of the jars out of the cabinet in the kitchen and be transported to a warmer, happier time. I bought much of the equipment years ago, as well as cookbooks and even took a pickle making class. But, still, no canning.
Until last weekend.
My new roommate learned to can with her mother. She also brought enough pears, peaches, and other goodies to feed a small army from her parents farm on the Eastern Shore of VA. So, the time was finally right to learn how to can.
We went to a nearby hardware store to get the remainder of the supplies (namely, the can rack and pot for canning). We loved the store: Strosniders in Silver Spring MD. After being in Home Depot and Ikea almost every week for the last couple months, it was wonderful to go to a real hardware store. And, they had everything we needed - on sale!
Our plan (after a successful trip to the Greenbelt Farmer's Market):
- Pears in apple juice
- Peaches in apple juice with cinnamon and cloves
- Hot pickled green beans
- Pear butter
Here is the recipe for the pickled green beans, of course I can't recommend it yet since we haven't tasted the goods. But it was very easy and looks good.
Spicy Green Bean Pickles (adapted from Okra Pickles from Preserving Summer's Bounty)
What You Need
- 5 cups water
- 3 cups vinegar
- 3 teaspoons celery seeds
- 6 quarts green beans (we cut the whole recipe and only did 1/3 of this)
- 24 baby onions (only had big onions, so we cut these up into small chunks)
- 6 garlic cloves
- 6 hot chili peppers (optional)
What You Do
1. Combine water, vinegar, and celery seed in a pot and bring to a boil.
2. Pack the green beans into a hot, scalded pint jar. In each jar, put 4 onions, 1 clove garlic, and 1 chili pepper.
3. Pour the boiling brine over the green beans, leaving 1/4 inch head space.
4. Seal and process for 15 minutes in a boiling water bath.
5. Let ripen for several weeks before using.


So, it was a huge success and so much fun. See me below enjoying myself with the equipment:  We only lost one can (it cracked and broke in the canner). We did learn a very important lesson though. When canning, only make one type of good. Switching between the green beans, peaches, pears, and pear butter was difficult and left us with fewer cans of each. So, when our 1 can of peaches broke, we were both very disappointed.
I definitely hope that we get to doing this again very soon.
Until last weekend.
My new roommate learned to can with her mother. She also brought enough pears, peaches, and other goodies to feed a small army from her parents farm on the Eastern Shore of VA. So, the time was finally right to learn how to can.
We went to a nearby hardware store to get the remainder of the supplies (namely, the can rack and pot for canning). We loved the store: Strosniders in Silver Spring MD. After being in Home Depot and Ikea almost every week for the last couple months, it was wonderful to go to a real hardware store. And, they had everything we needed - on sale!
Our plan (after a successful trip to the Greenbelt Farmer's Market):
- Pears in apple juice
- Peaches in apple juice with cinnamon and cloves
- Hot pickled green beans
- Pear butter
Here is the recipe for the pickled green beans, of course I can't recommend it yet since we haven't tasted the goods. But it was very easy and looks good.
Spicy Green Bean Pickles (adapted from Okra Pickles from Preserving Summer's Bounty)
What You Need
- 5 cups water
- 3 cups vinegar
- 3 teaspoons celery seeds
- 6 quarts green beans (we cut the whole recipe and only did 1/3 of this)
- 24 baby onions (only had big onions, so we cut these up into small chunks)
- 6 garlic cloves
- 6 hot chili peppers (optional)
What You Do
1. Combine water, vinegar, and celery seed in a pot and bring to a boil.
2. Pack the green beans into a hot, scalded pint jar. In each jar, put 4 onions, 1 clove garlic, and 1 chili pepper.
3. Pour the boiling brine over the green beans, leaving 1/4 inch head space.
4. Seal and process for 15 minutes in a boiling water bath.
5. Let ripen for several weeks before using.


So, it was a huge success and so much fun. See me below enjoying myself with the equipment:
 We only lost one can (it cracked and broke in the canner). We did learn a very important lesson though. When canning, only make one type of good. Switching between the green beans, peaches, pears, and pear butter was difficult and left us with fewer cans of each. So, when our 1 can of peaches broke, we were both very disappointed.
 But, we got some great looking cans out of it:


I definitely hope that we get to doing this again very soon.
Saturday, August 14, 2010
Update on the garden
Since the crazy rainstorm and disasters in my backyard, I've been reluctant to tend to the garden. Not only is it a bit depressing to go out there in all the mess, but every time I do I get about 1000 bug bites. My legs look like they did when I was a 10 year old at sleep away camp-- bruised and fully of bug bites-- not good. But, thankfully, we've gotten some rain recently and despite all odds things are still growing. I even have a second tomato and some baby tomatoes. Take a look:


 I hope I am able to eat something from the garden before the end of August. We will see...


 I hope I am able to eat something from the garden before the end of August. We will see...
The best thing to do with tomatoes
Also while visiting NJ, my sister and I prepared my favorite appetizer for my mother while she was at work. This is an amazing recipe from Food and Wine and I was shocked that it was not on my blog available for you to try. I love this! I could eat the whole thing myself. It takes patience to wait for the bruschetta but it is worth it. Try to get the two varieties of honey, but it is not a deal breaker if you can't. I've made the recipe many times with only clover honey.
Honey-Tomato Bruschetta with Ricotta (from Food and Wine)
What You Need
- 2 pints cherry or grape tomatoes, halved lengthwise
- 1 1/2 tablespoons extra-virgin olive oil
- 2 tablespoons clover honey
- 2 teaspoons thyme leaves
- 1 teaspoon kosher salt
- 1/8 teaspoon freshly ground pepper
- 12 baguette slices, cut 1/2 inch thick on the bias
- 1 cup fresh ricotta (8 ounces) (see my post on how to make it)
- 1 tablespoon buckwheat or chestnut honey (unfortunately, I only had clover so I just used 3 tablespoons clover honey)
- 6 basil leaves, thinly sliced or torn
What You Do
1. Preheat the oven to 300°.
2. Line a large rimmed baking sheet with parchment paper.
3. In a large bowl, toss the tomatoes with the olive oil, honey, thyme leaves, salt and pepper.
4. Scrape the tomatoes onto the prepared baking sheet and turn them cut side up.
5. Bake the tomatoes for about 1 hour and 25 minutes, until they begin to shrivel and brown. Let cool.
6. Preheat the broiler.
7. Spread out the baguette slices on a baking sheet.
8. Broil for about 30 seconds on each side, until the edges are golden brown.
4. Spread the ricotta over the baguette slices and top with the slow-roasted tomatoes.
5. Lightly drizzle the tomatoes with the buckwheat honey, sprinkle with the sliced basil and serve with additional buckwheat honey on the side.
This is a great dish to share with family and friends while tomatoes are at the peak!
Soup, Summer, and Roasted Red Peppers
I spent the early part of this week with my family up in NJ. It was wonderful to hang out, relax, and spend a day at the Jersey shore. We spent the day at Spring Lake, had lobster at Klein's, and got yummy salt water taffy. We also did some fun family cooking, including this wonderful summer soup. Rarely do I eat chilled soup, so I was nervous to try it. But, how can you go wrong with roasted red peppers?!
Creamy Chilled Red Pepper Soup (from About.com)
What You Need
- 4 red peppers
- 1 onion, chopped
- 2 tbsp butter
- 1 tbsp chopped fresh rosemary (I used more)
- 5 cups vegetable broth
- 1/4 cup tomato paste
- 1/2 cup cream
- 1/4 tsp paprika
- salt and pepper to taste
What You Do
1. Heat oven to 400 degrees or set to broil.
2. Slice peppers in half and remove seeds.
3. Broil peppers for about 20 minutes. (I sprinkled some olive oil before broiling)
4. In a large sauce pan, cook the onion and rosemary over medium high heat.
5. Add the peppers and vegetable broth and reduce to a simmer.
6. Add tomato paste and allow to cook for at least 20 minutes.
7. Transfer soup to a blender or food processor and process until smooth.
8. Add remaining ingredients and stir to combine well.
9. Serve chilled.
Since this one was a success, I'm curious to try some more summer soups before August is over. I suggest you do to.
Subscribe to:
Posts (Atom)